Do you "shoulder" your way through it?

Dear Sweet Community,

Its been a little while. Lots of transition and change with my private therapy practice growing. Have you ever thought about how your body reflects your attitude? I have  recently gotten a shoulder injury and I am wondering; "am I just shouldering my way through it all?" . 

Who likes injury? No-one right? They are not fun right? 

So my shoulder injury has really gotten me thinking about how to protect our shoulders in the yoga practice. What would it be like to do every pose from the perspective of shoulder care instead of just shouldering our way through them? What could it be like to apply this attitude in our daily routines? I have even noticed that when it is cold outside I let my shoulders squeeze up my neck as a way to stay warm...hmmmm...there must be a kinder way! What if this kindness to our shoulders could really reflect back to us our habits in our own bodies and how they tell us something about how we are in the world?...

Alignment Tip:

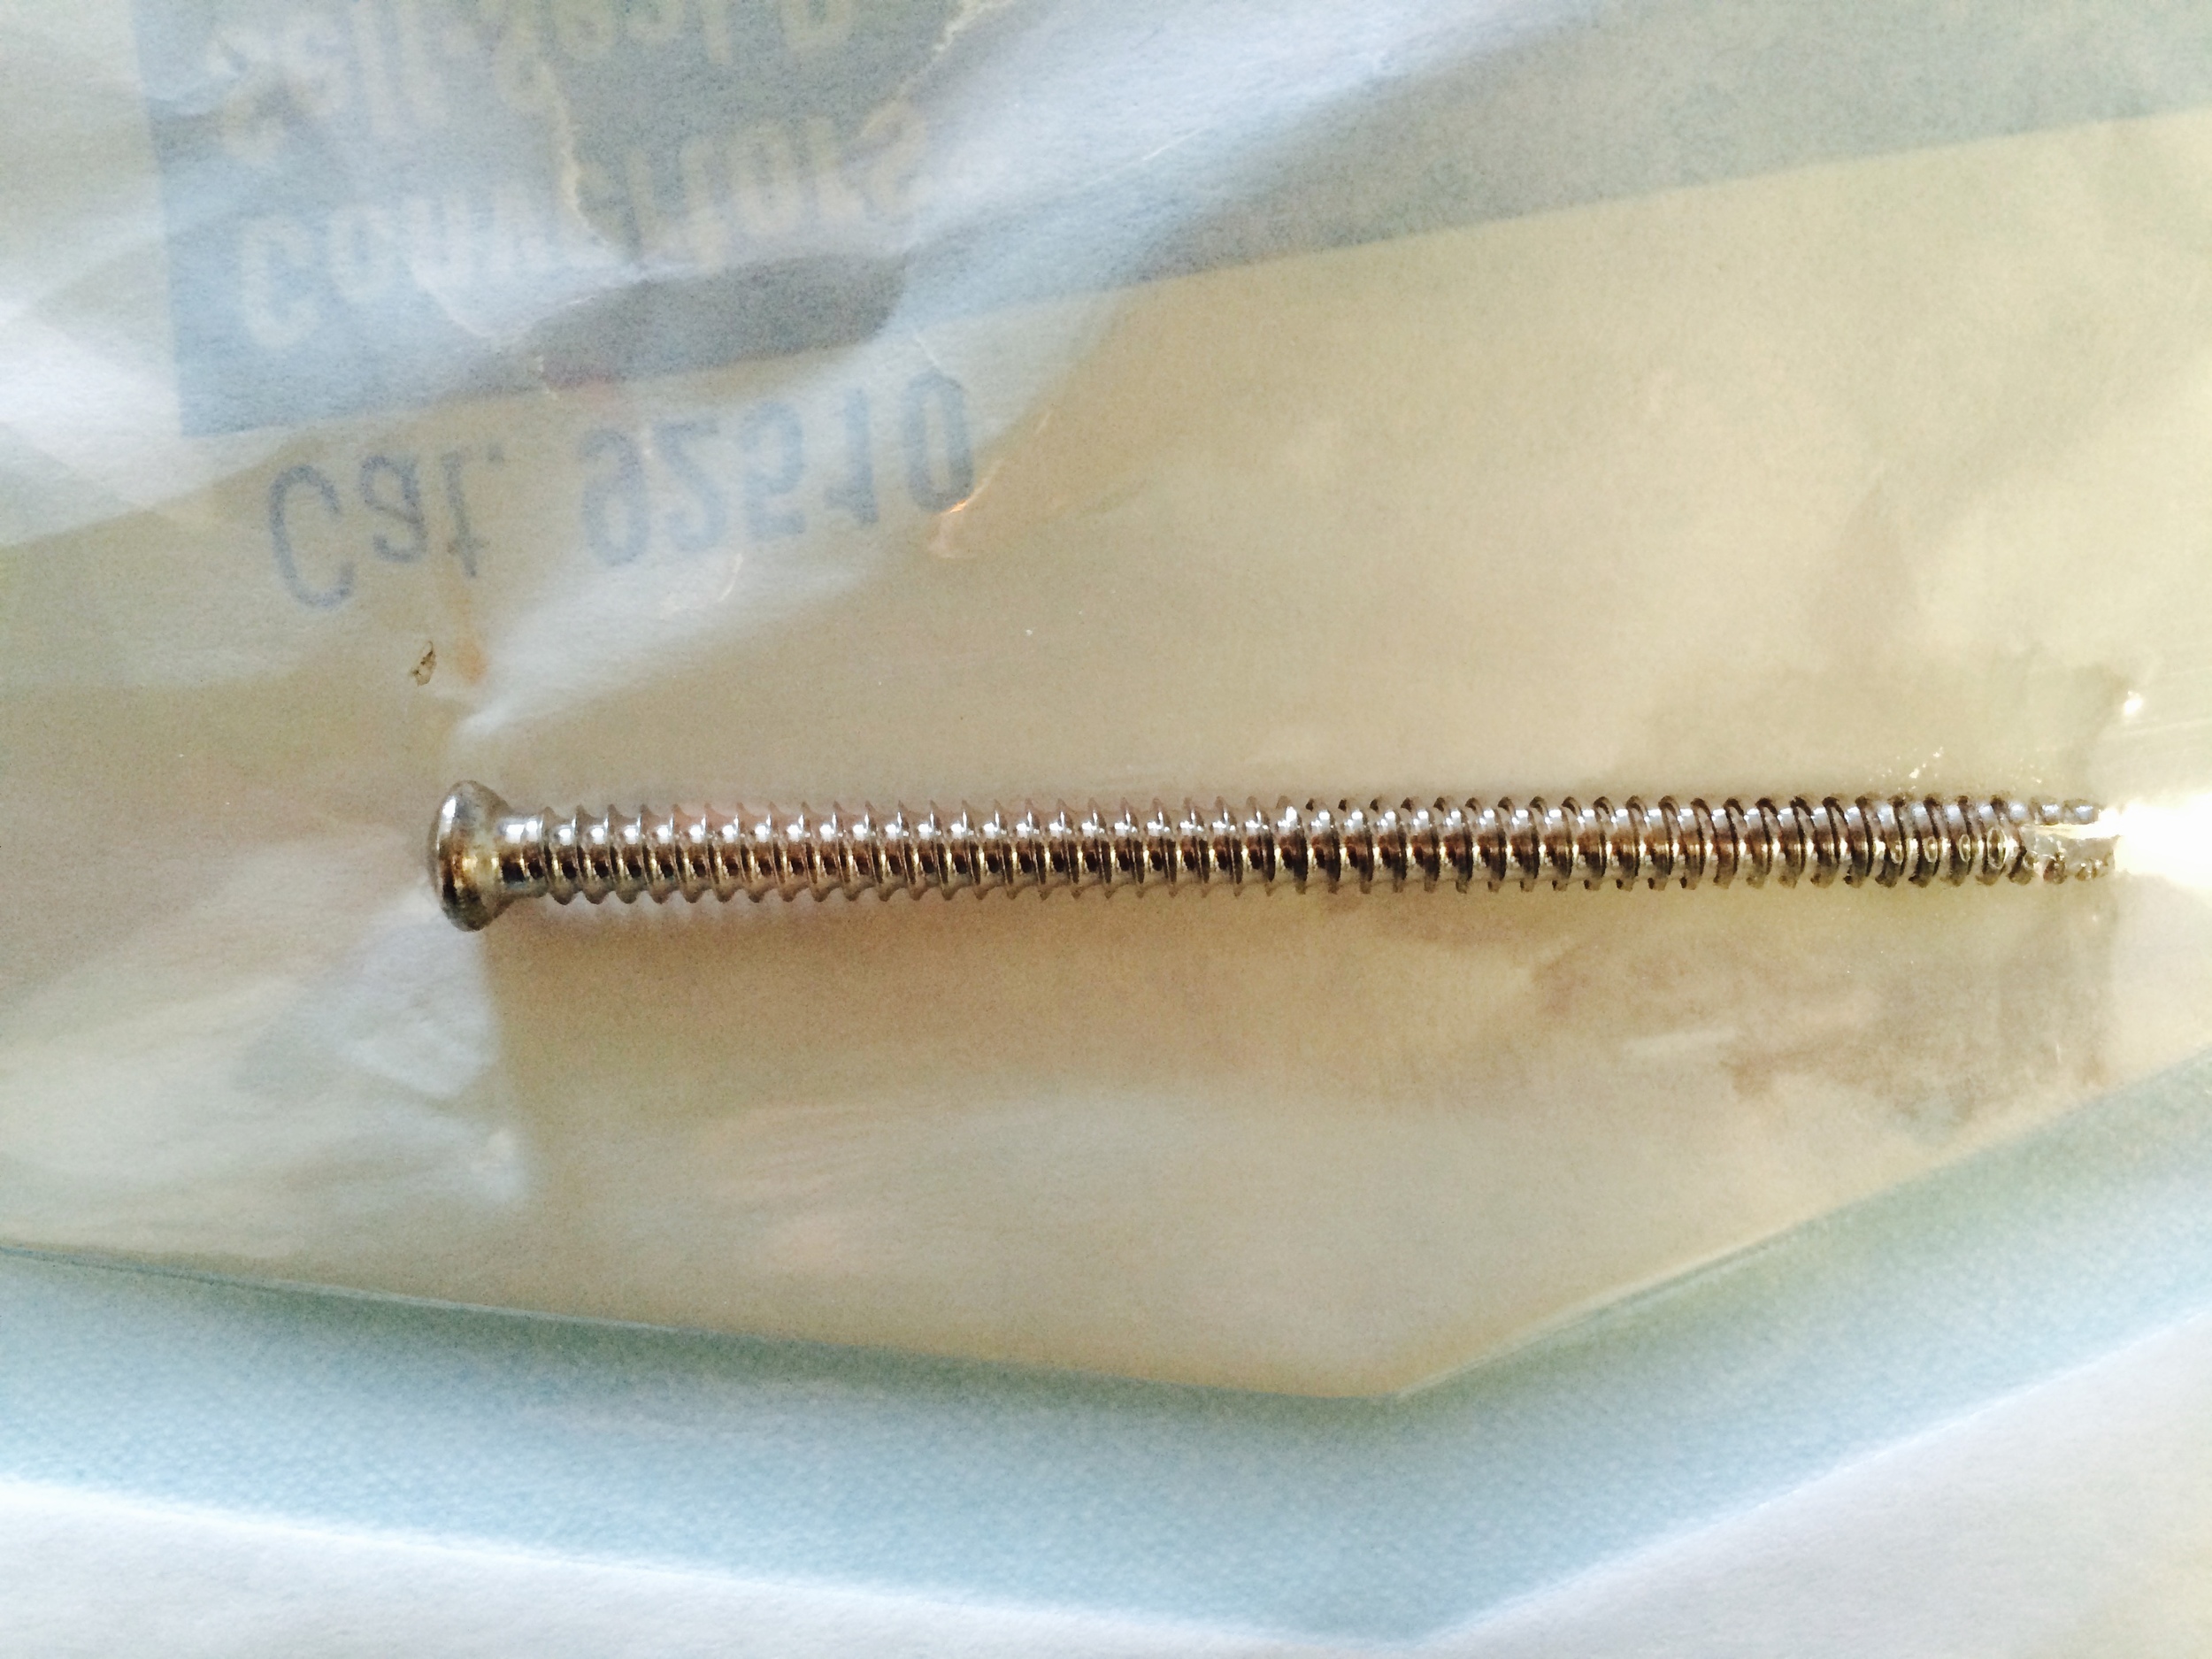
The shoulders are one of, if not the, most unstable joint in the body. This helps us have a lot of flexibility in the joint which we need and it also leaves the joint very vulnerable. I realized that, through rock climbing, I was doing difficult moves on steep climbs without my shoulders in a more stable position. This caused an impingement. And boy is it yucky. Just yucky.

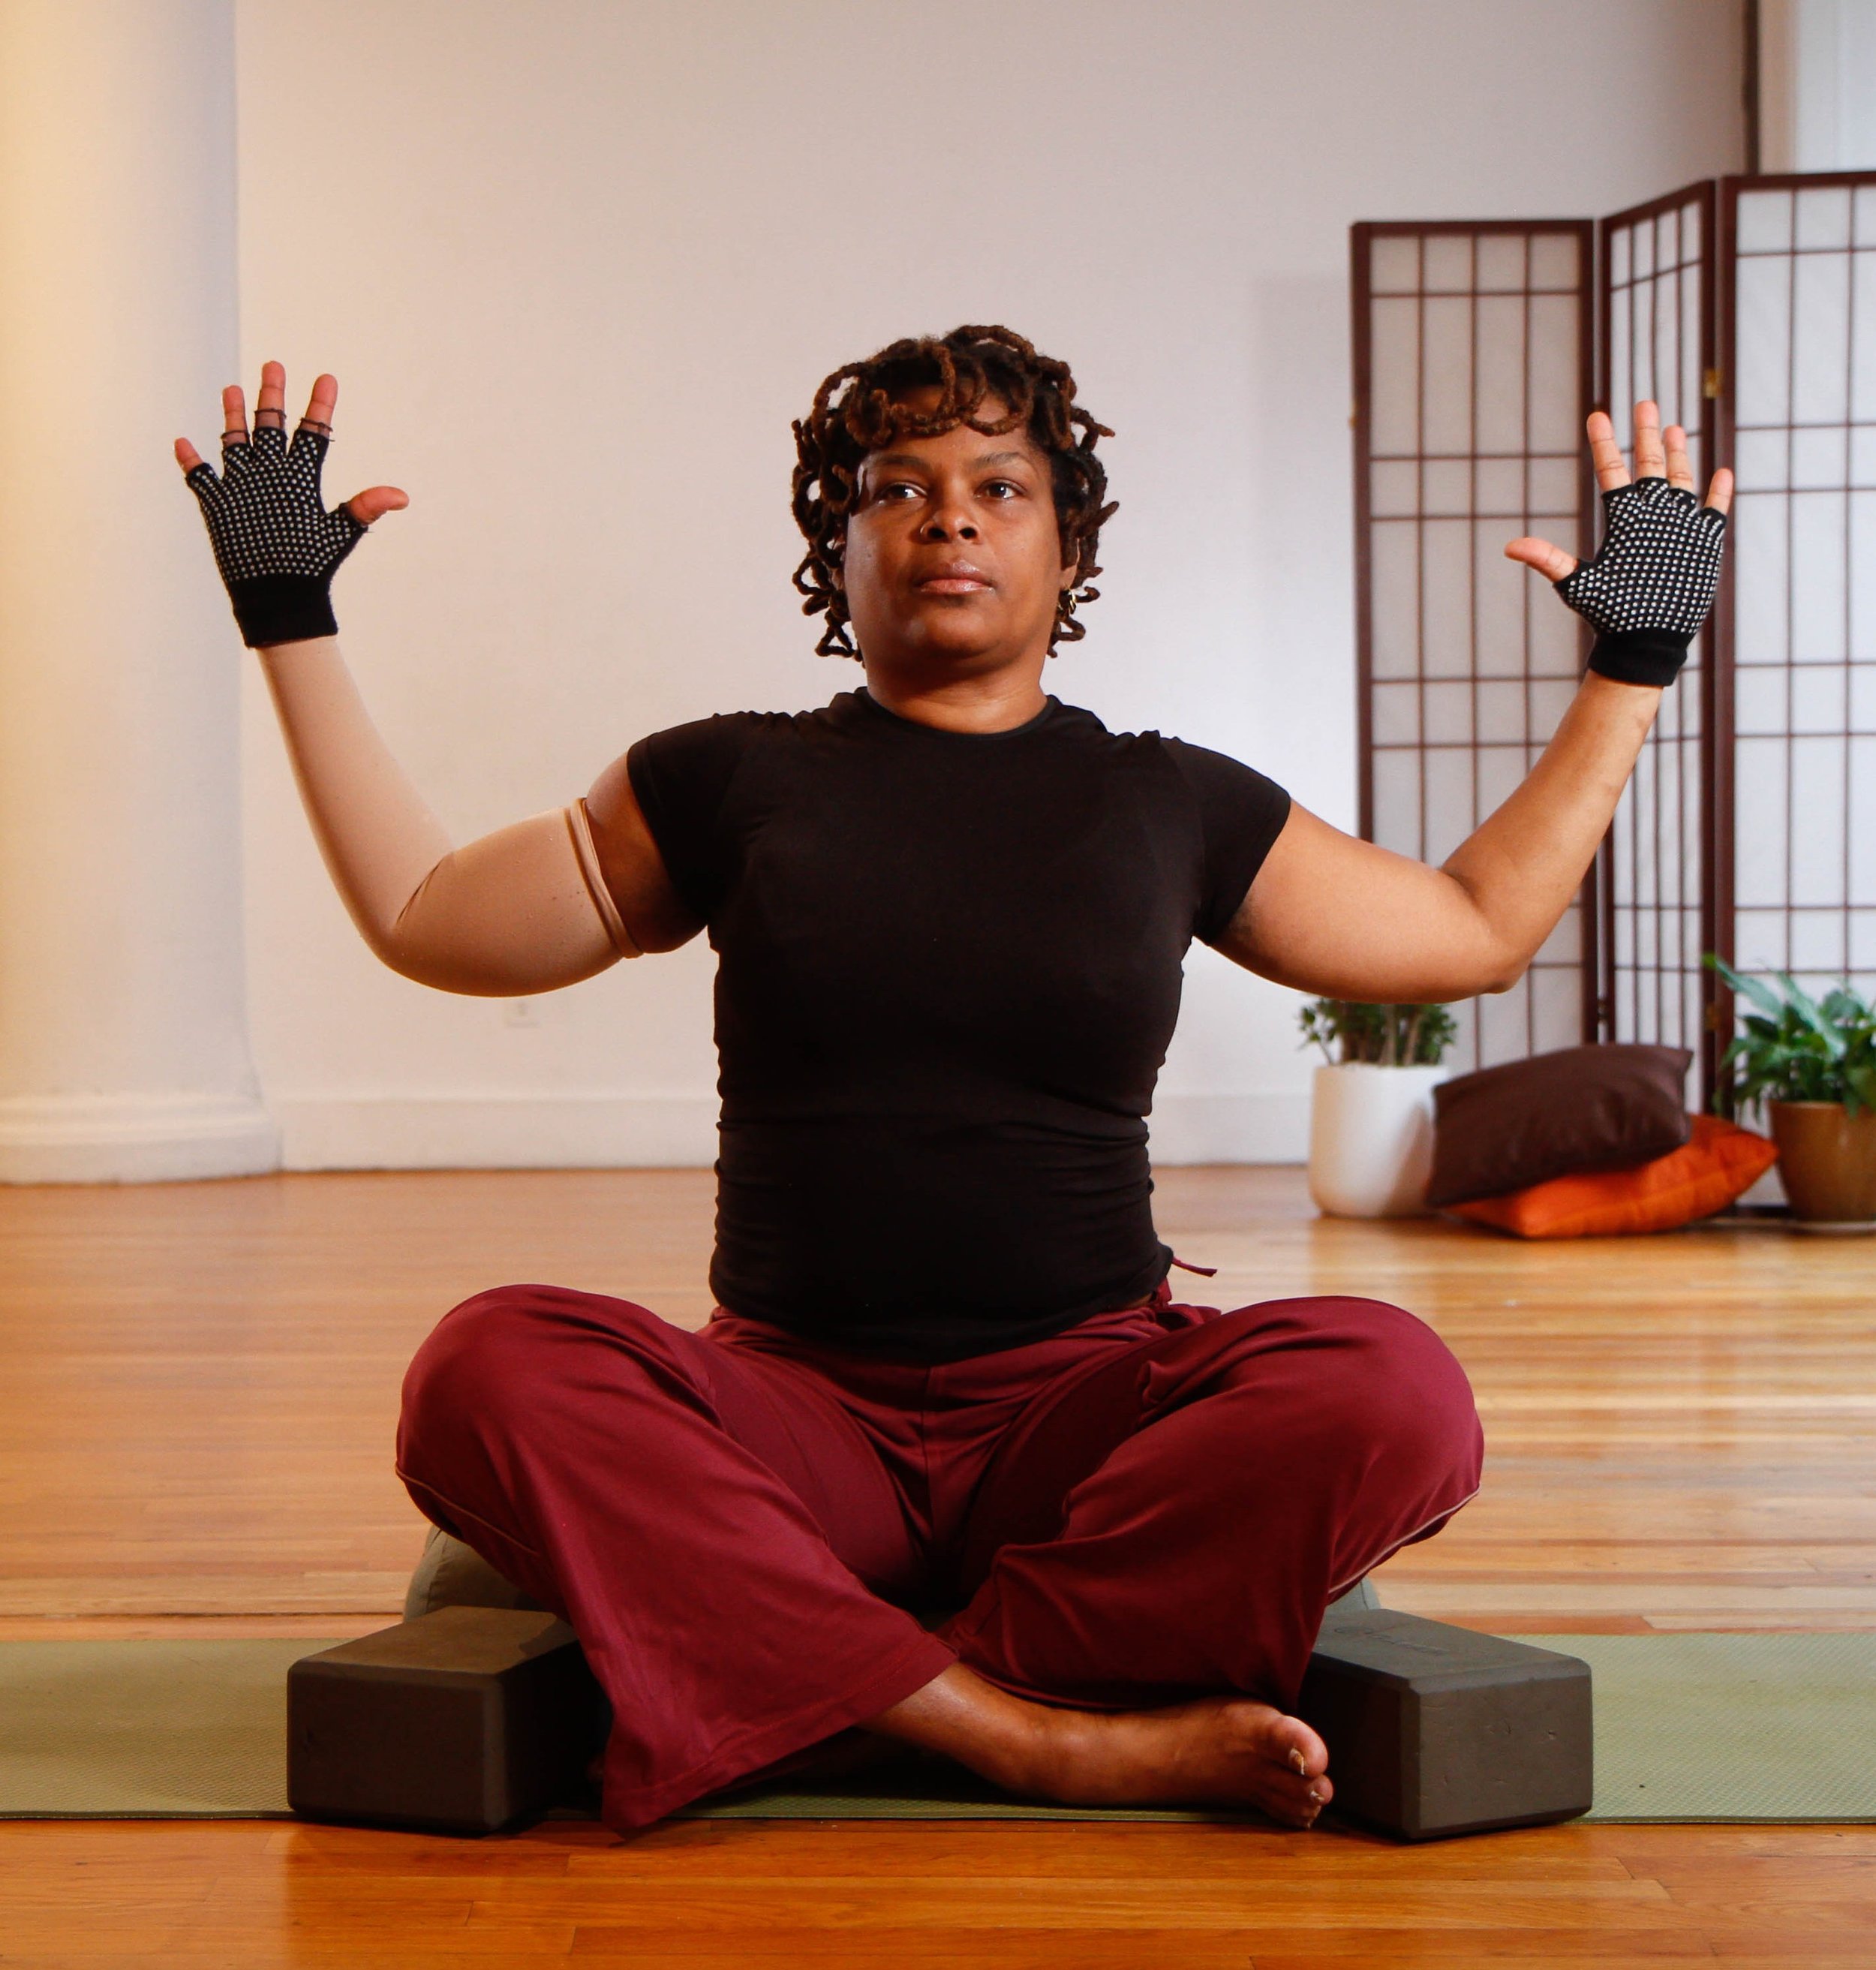
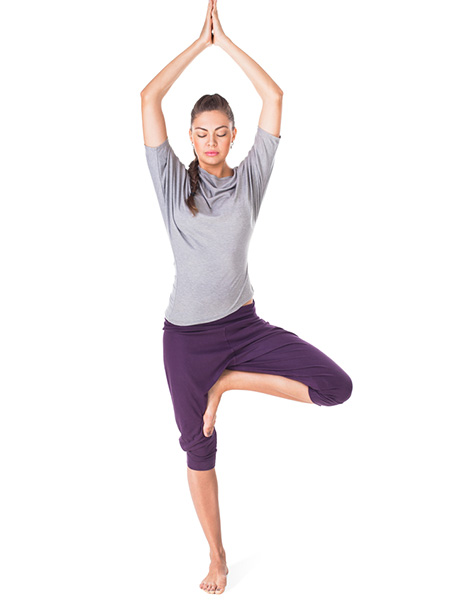
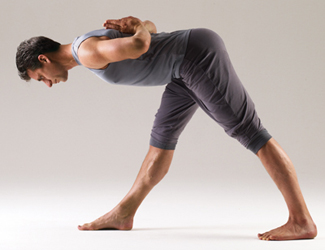
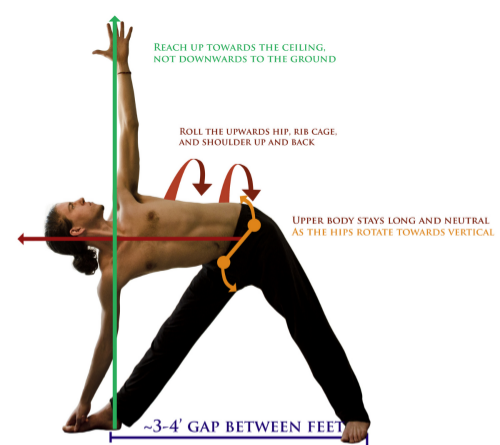
To avoid such an impingement it is important to think of how to stabilize the joint. While sitting try lifting your arms and bend the elbows with the palms facing forward into goal post arms. Gently pull the shoulder blades down the back and feel them anchor into position. You should feel the muscles on top of, beneath, and below the shoulder blades activate. This is important since these muscles are the big lifters and are strong. Now reach your arm forward like you are going to pull a shade down. Notice that there is no pinching in the shoulder anywhere like this. 

Try the same thing but let your shoulders ride up by your ears as your reach for the shade. You will feel the top of the arm working causing a grippy feeling in the upper shoulder. 

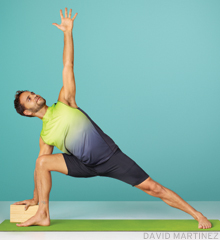
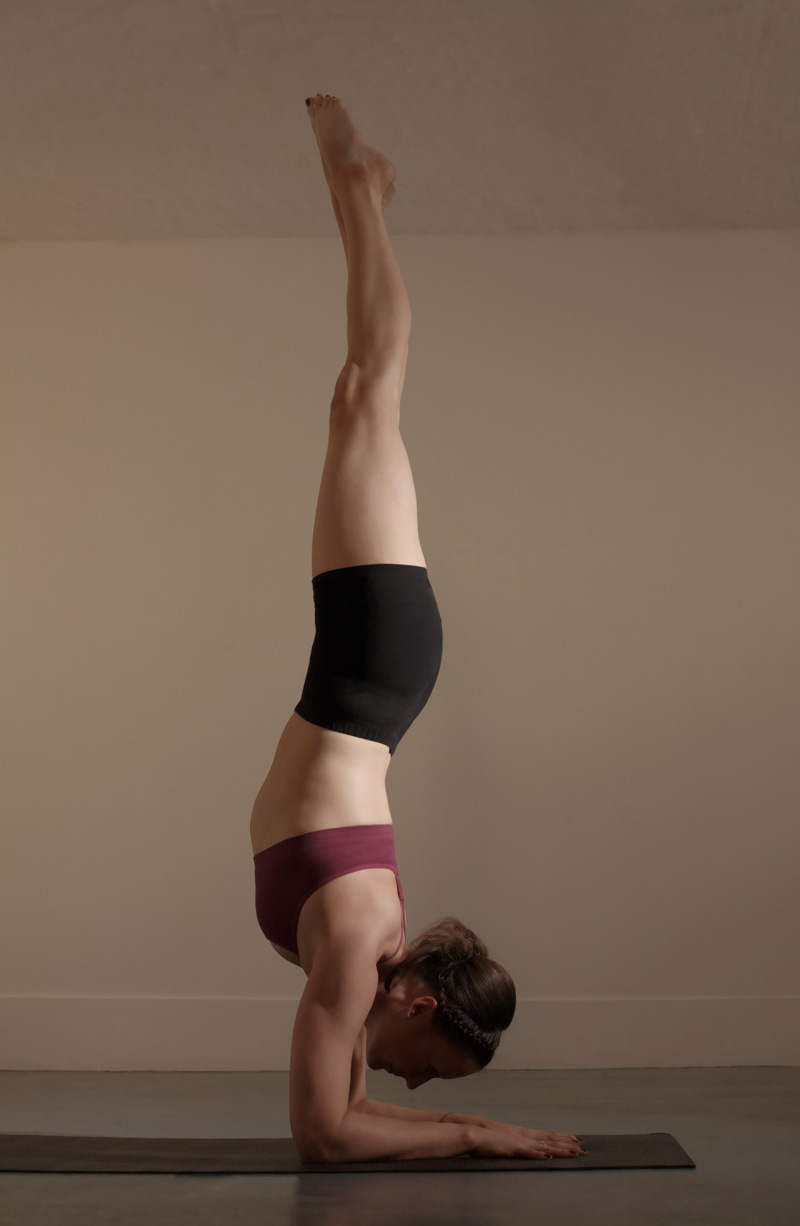
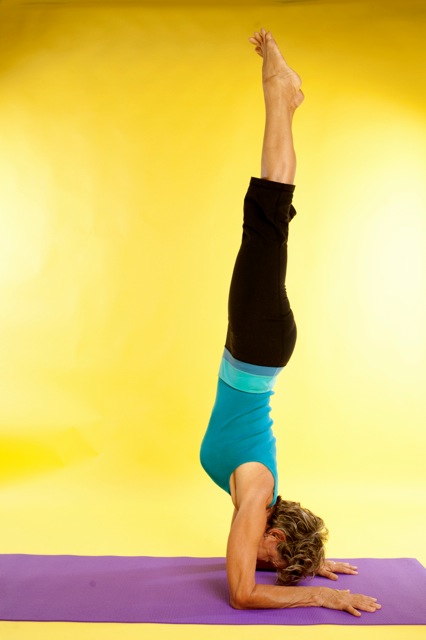
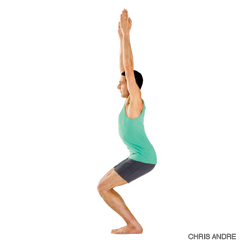
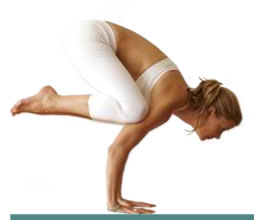
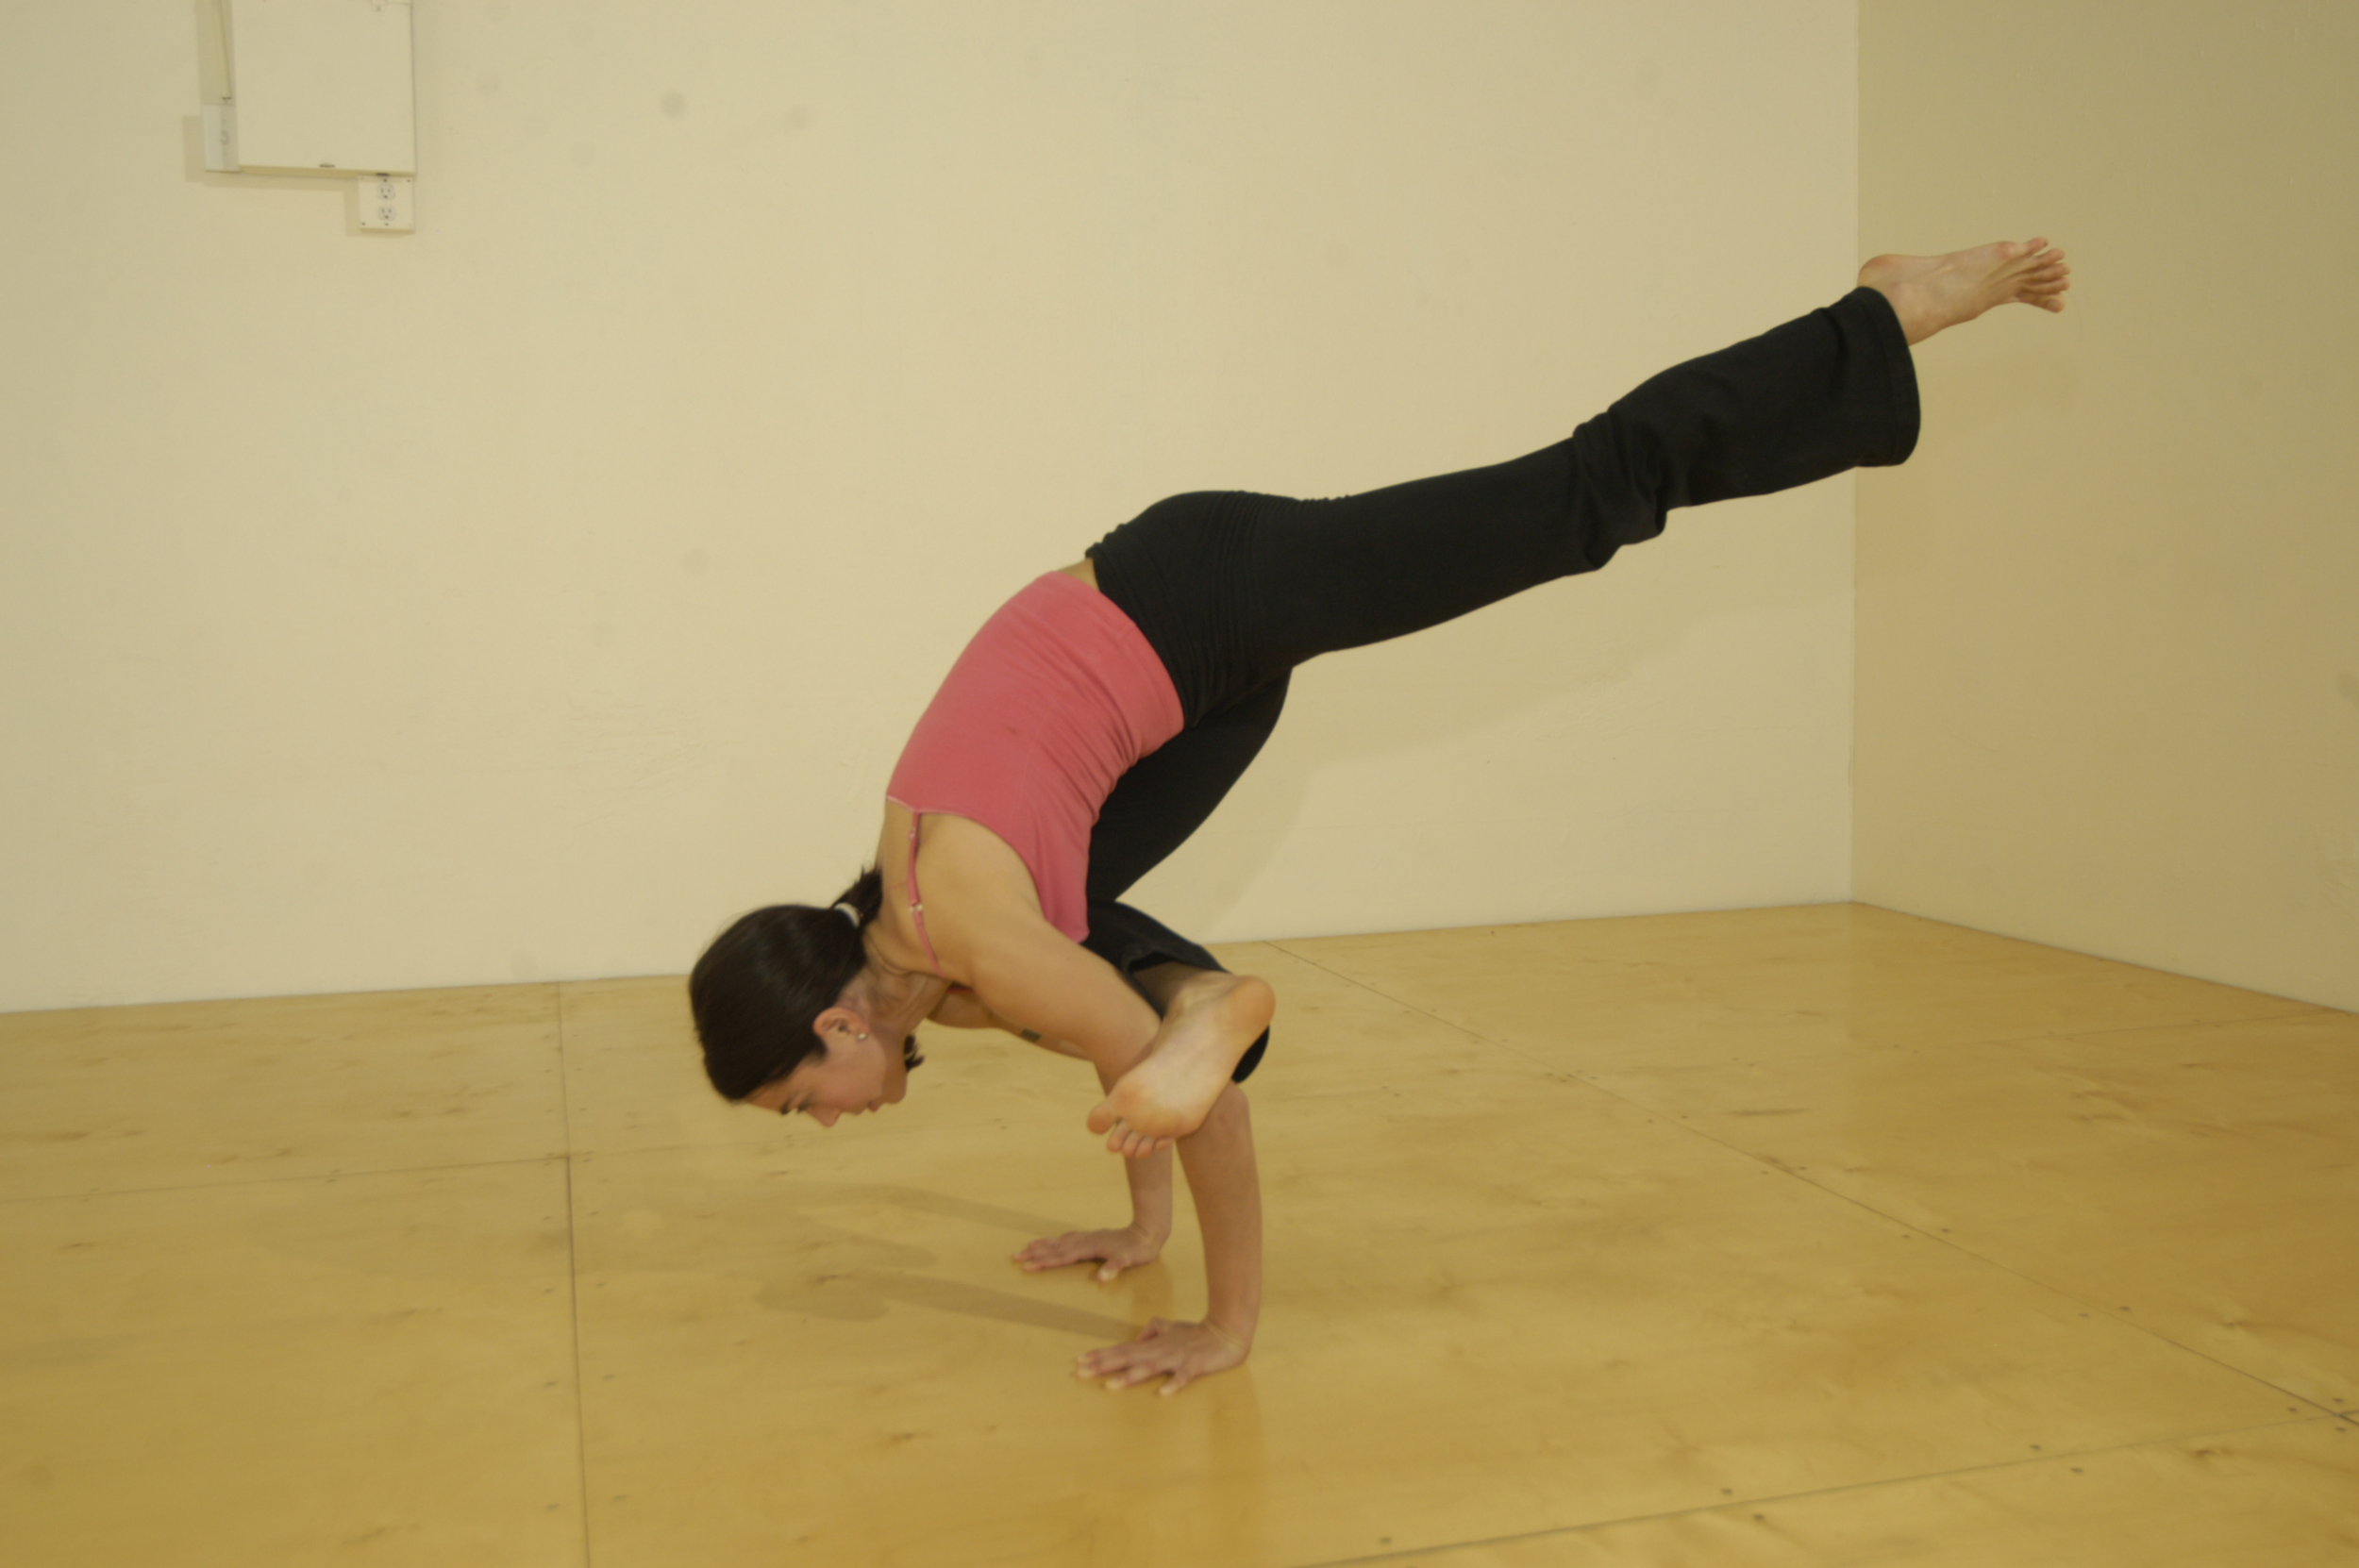
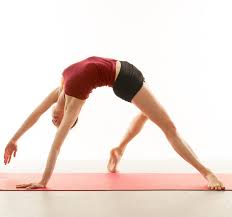
In plank, chaturunga, downward facing dog, upward facing dog, cobra and all of the inversions.  The shoulder blades should be in this anchored position down the back. I am not suggesting an over squeezing where you are pinching beneath the blades, but rather a directional of down and slightly in. This means that if you can only go down in chaturunga a few inches while still keeping your blades down the back, then only go down a few inches. 

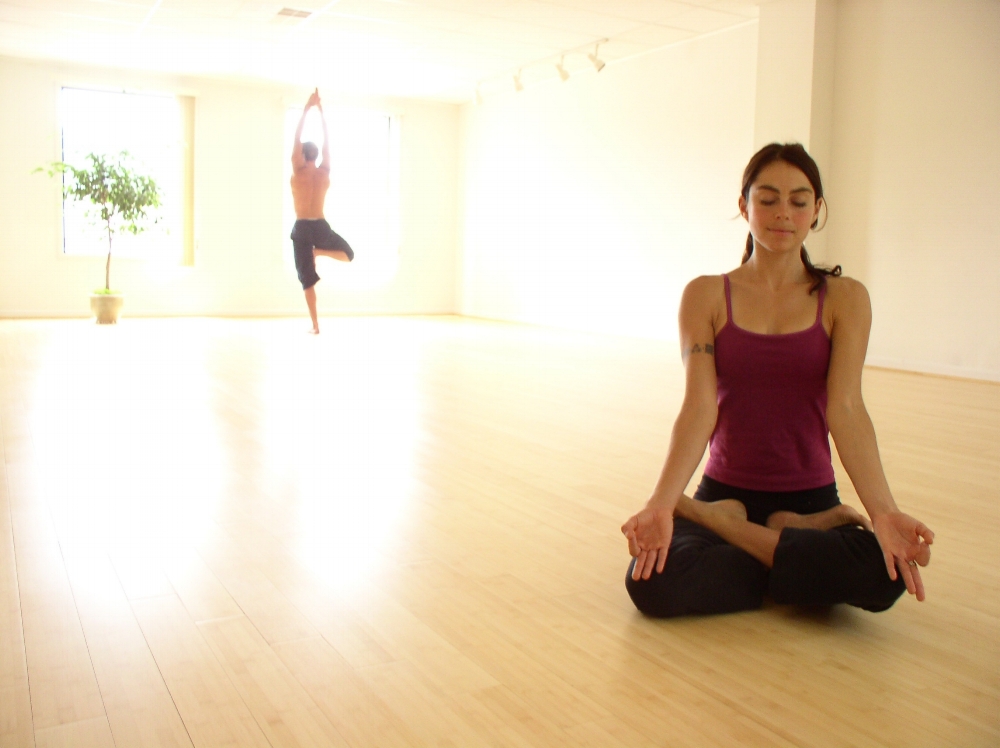
When you begin to practice this way the practice becomes a lot more mindful. Each pose demands a certain care and investigation. I have been practicing this way, and my impingement is getting much better. 

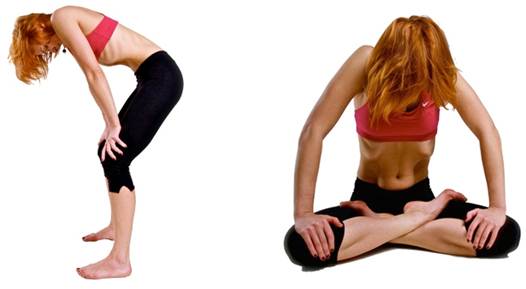
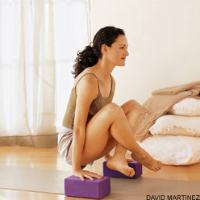
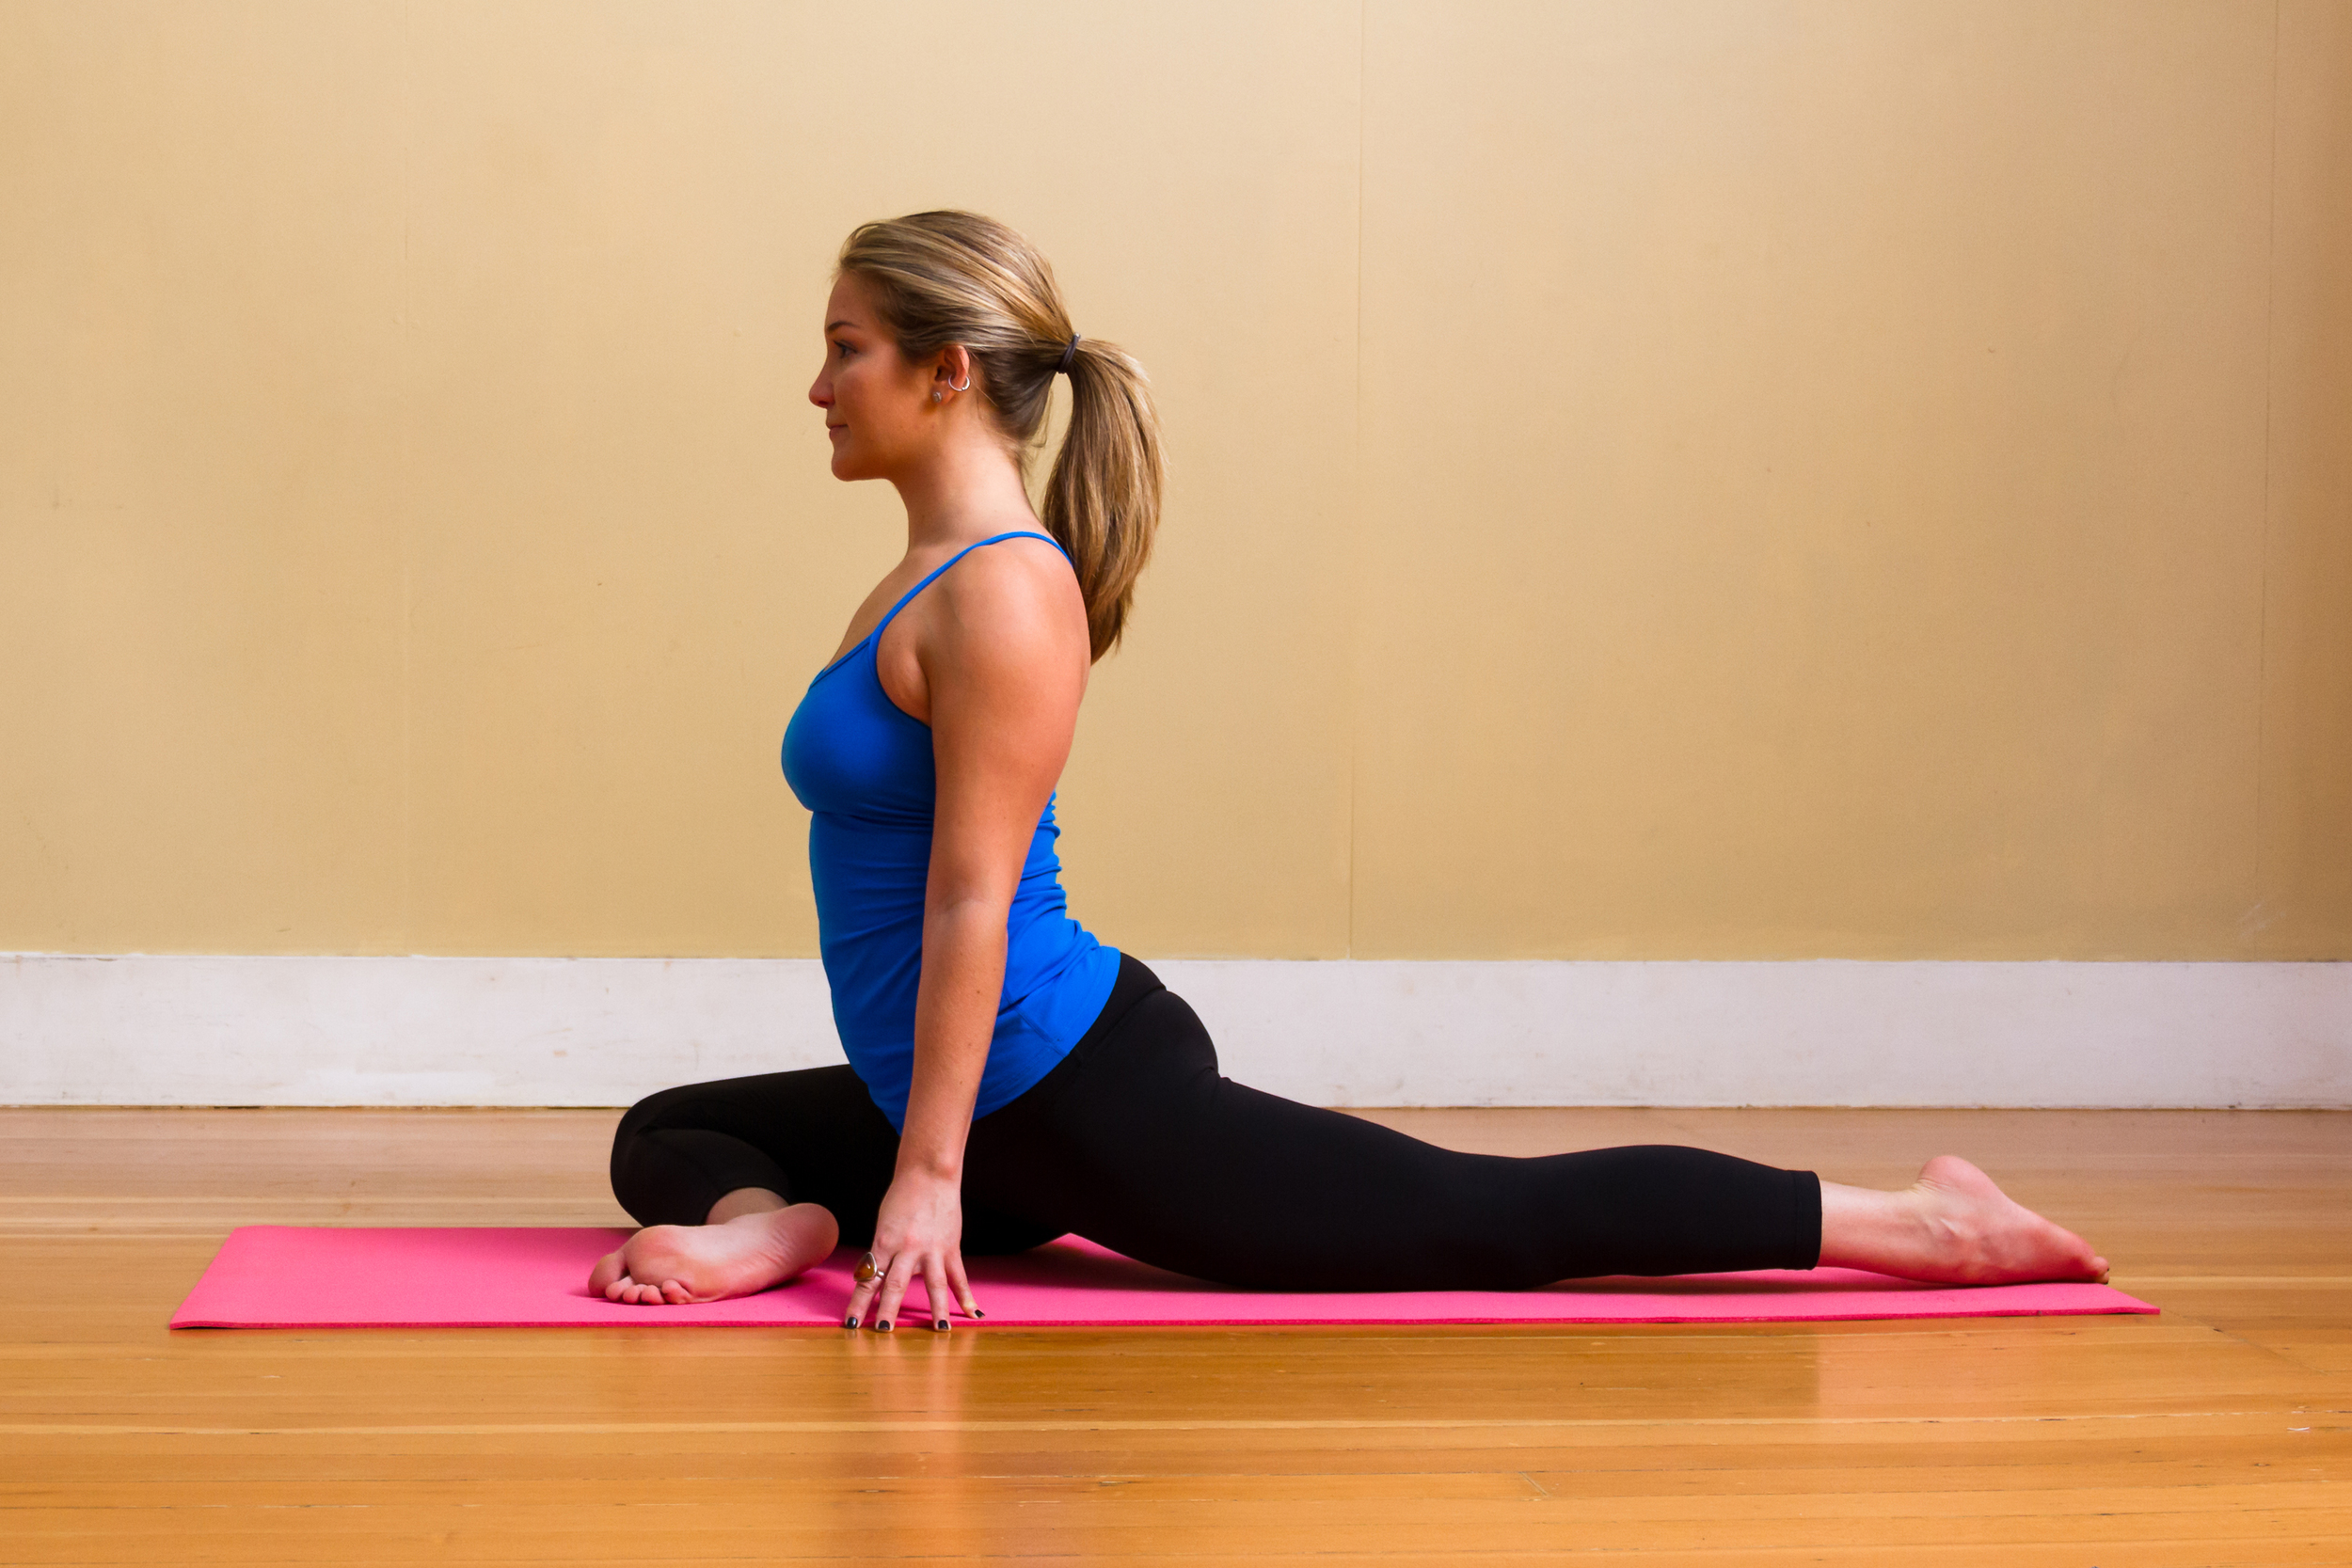
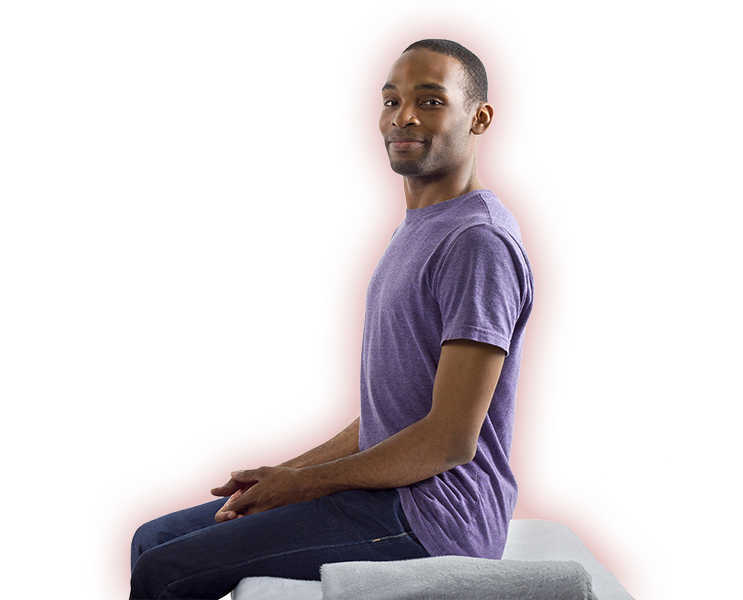
You know the old saying your knee bone is connected to your thigh bone... all things are related when it comes to the body! So the way we sit has a connection with shoulder health. Sitting in a slouched position causes the shoulders to round and then we are using the upper arms to type , lift etc. Now compare that to sitting straight and how it encourages the shoulder blades down the back in a stabilized position. Also, notice the emotional reaction you have as you look at these two pictures. We are more open and receptive when we are sitting tall and stabilized. Notice if, in your daily life, you stand or sit slouched. Try finding a straight spine and your goal post arms and then relaxing your hands by your side. This will remind your body to not be lazy with stabilization. It also makes you feel more open hearted and GOOD.

This takes work and practice. But that is the practice of yoga. It is a practice of care and attention, in short; awareness. As we cultivate an awareness of ourselves, we learn to do the same for others. As I slow down and pay attention to my own lazy moments, I can see the ways I am impatient with others. I am learning that true listening, true caring, is about being present. It is in the noticing...of the small almost imperceptible things.

So my yogi friends, I encourage you to protect your shoulders and use it as a way to get real present with yourself and others. Let me know how it goes!!!

Upcoming Trainings:

I am really excited to announce that I am part of the 2017 Teacher Training team for Studio B. I will be leading the anatomy portion as well as other bits. Mostly I am just so excited to be a part of Studio B's first year doing this training program. Anatomy is something I am very passionate about. And I am passionate about creating a new generation of teachers (or yogis that just want to go deeper) who use anatomy to really inform them about their sequence choices. 

So YAY! Here we go...anatomy, ANATOMY, ANATOMY!

As always dear yogi's and yogini's,

See you on the mat,

Ariel


It's not What is Behind You...

Hi Sweet Community,

So here we are, December, and it feels like winter. It is cold out there now! I have really been enjoying teaching all of you and connecting with you in some way. Can you believe that I have been in Lewisburg almost a year? Wow time has flown by. 

As I reflect on the amount of time I have been here, I realize that, though I have embraced my life and community here, a part of me has been holding on to my life in San Francisco. I know change and transition takes time. It's hard to ease into change and uncertainty. Our country is in a time of transition now and there are those who feel the uncertainty that lies ahead. This is because we cling to what is behind us when we don't know what is in front of us. In Yoga, we turn to Ganesha, the funny looking elephant guy and the deity of transition and change. We ask Ganesha to help us move through the unknown with an open heart. Needless to say I have been really pestering Ganesha this year...like a lot

The past is the back side of the body since it is what is gripping us from behind. For this weeks alignment tip, I would like to talk about responsibly stretching the hamstring and loosening our grip on what is behind us. So we may invite the spirit of Ganesha into our practice and lives. 

Alignment Tip:

In my years as a yoga teacher (gosh has it already been 14 years?) I have adopted the concept of continuous connective tissue lines. These are called the "deep facial lines". I learned about the lines through the anatomy trains methodology. I like this perspective because it reminds us that our connective tissue is all connected and in relationship to one another. This concept is important when stretching the backside of the body, or the "deep back line". 

Our muscles are the most dense in the belly of the muscle, at either end they taper out into a tendon. These tendons are very vulnerable because they are much thinner than the belly of the muscle. For this reason, we don't want to overstretch where the muscle attaches to bones. We just want to get a little length. I have torn my hamstring from over stretching at the attachment site and yowzers it hurts!

To responsibly stretch the backs of the legs start standing with a block between your legs up high by your pelvic floor. As you squeeze the block press your big toes into the earth. This will give you a sense of your shin squeezing in. At the same time press down through the pinkie toes and feel your thighs roll out. This will engage your butt and therefore keep the top of the hamstring from over stretching. Send your arms to the sky and imagine all of the muscles along the backside of your body, from your achilles tendon up to the base of your skull, elongate together. This is the "deep back line".

Keep this length as you come down through a flat back so your hands rest on your shins. Keep elongating and slowly fold forward in to a standing forward bend. Send your weight down into your toes and rest on your heels so you aren't leaning into the top of the hamstring. 

When doing a forward bend like Parsvottonasana (Pyramid Pose), keep your hips square so that, again, you aren't stressing the top of the hamstring. A good rule of thumb is to find that same flat back with the hips square and press down evenly through your heels. This will always protect the hamstring. You can even keep a micro bend in the front knee to take pressure off of the vulnerable part of the hamstring. 

The same applies to Hanumanasana (Monkey pose or full split). When you go into splits, don't let the front leg get away from you. Move slowly, pulling the hip back so the hips are in alignment and the back quadricep is rolling forward and into the ground, just like your pyramid pose. 

You can strengthen the hamstring by doing warrior 3 or doing one leg down dog with the leg parallel to the earth. Both of these exercises will encourage the top of the hamstring to engage and strengthen.

Remember that the stretches are really just a way to help the body release what it holds onto energetically. Don't forget to wink at Ganesha as he watches over you ;)

Upcoming Retreat: 

HEY GUYS, THIS RETREAT IS ALMOST FULL. IF YOU WANT TO JOIN US PLEASE REGISTER NOW SO THAT WE CAN RESERVE YOUR SPOT AND/OR PUT YOU AT THE TOP OF THE WAITLIST. WE REALLY DONT WANT TO LEAVE ANYONE BEHIND AND WE DO HAVE SOME FLEXIBILITY WITH THE WAITLIST!!!

THE MINDFUL PRACTICE

With Ariel Howland and Jason Leddington

A 3day/2night retreat: February 3rd-5th, 2017

Mayacamas Ranch, Calistoga, CA                                                                                                                                                                                       

Every year, after the holidays, do you crave some self care? 

Simply put, self care and pampering is what this retreat is all about. Set in the extraordinary scenery of Mayacamas Ranch, nestled in the vineyards of Calistoga, join us on an oasis built just for you...

We will practice some yoga. Yoga which is meant to restore, and vinyasa classes to detox. (4 classes in total with Ariel). Each class will be unique; attending to your body, soul, and deepening your connection to the practice.

We will learn to meditate (2 sessions with Jason). Meditation is a tool for getting all blissed out and learning how to stay blissed out. Jason will be sharing with us tools specifically for stress reduction which you can take with you (*see below for Jason's bio).

We will eat REALLY, RIDICULOUSLY good food. We will chat and have a bonfire; we will build community.

You are welcome to enjoy free time; hiking, swimming in the pool or soaking in the hot tub, go local wine tasting or get a massage!! (because this is your oasis). 

WE are so excited to bring you to this deeply calming place. We are equally as excited to attend to you and give you the space to to feel nourished. 

Price of Admission:

  • $850 Single 
  • $700 Double
  • $550 Dorm (Yikes, sign up now these fill fast!)

TO REGISTER CLICK HERE.


(*Jason Leddington is a philosophy professor at Bucknell University where he incorporates mindfulness meditation into his classes. He has been studying and practicing meditation since 2004. He is currently doing his training in the Mindfulness Based Stress Reduction Method. )


Upcoming Workshops:

Recover from the Holidays 101: at Studio B Yoga Center
Sunday, January 29, 2017 from 2:00 - 4:00 p.m.

Feel empowered with quick, easy tools to use when stress arises!

This is a workshop designed to reduce anxiety surrounding the holiday season. While we all love this festive time of year, the holidays come with a bit of anxiety. Stress comes in all shapes and forms and is very hard to shake. If you're a person who experiences stress, and want to find a more easeful way to coexist with it, know that you're not alone - there are many of us out there! We will use: breath, poses designed for concentration and relaxation, and mindful mediation to undo deep patterns of holding in the body which perpetuate stress. You'll leave feeling deeply relaxed and nurtured.

Let us support you in not only surviving the holidays, but thriving during this time of year!

As always my sangha,

See you on the mat,

Ariel


Quick question?

Hi Sweet Community,

I have a quick question for you. I am now reserving spaces for the upcoming Yoga and Mindfulness retreat in February. I want to make sure I reserve enough spaces for everyone and there is enough of an interest. If you are planning on coming, either register now so I reserve a space for you, or contact me. I want to make sure there is room for everyone!!

Our regular newsletter will be out this Friday :)

Upcoming Retreat: 

THE MINDFUL PRACTICE

With Ariel Howland and Jason Leddington

A 3day/2night retreat: February 3rd-5th, 2017

Mayacamas Ranch, Calistoga, CA                                                                                                                                                                                       

Every year, after the holidays, do you crave some self care? 

Simply put, self care and pampering is what this retreat is all about. Set in the extraordinary scenery of Mayacamas Ranch, nestled in the vineyards of Calistoga, join us on an oasis built just for you...

We will practice some yoga. Yoga which is meant to restore, and vinyasa classes to detox. (4 classes in total with Ariel). Each class will be unique; attending to your body, soul, and deepening your connection to the practice.

We will learn to meditate (2 sessions with Jason). Meditation is a tool for getting all blissed out and learning how to stay blissed out. Jason will be sharing with us tools specifically for stress reduction which you can take with you (*see below for Jason's bio).

We will eat REALLY, RIDICULOUSLY good food. We will chat and have a bonfire; we will build community.

You are welcome to enjoy free time; hiking, swimming in the pool or soaking in the hot tub, go local wine tasting or get a massage!! (because this is your oasis). 

WE are so excited to bring you to this deeply calming place. We are equally as excited to attend to you and give you the space to to feel nourished. 

Price of Admission:

  • $850 Single 
  • $700 Double
  • $550 Dorm (Yikes, sign up now these fill fast!)

TO REGISTER CLICK HERE.


(*Jason Leddington is a philosophy professor at Bucknell University where he incorporates mindfulness meditation into his classes. He has been studying and practicing meditation since 2004. He is currently doing his training in the Mindfulness Based Stress Reduction Method. )


As always

See you on the mat,

Ariel


I "Heart" You....

Dear Sweet Community,

I had such a lovely, but brief, trip to San Francisco and Big Sur. The scenery was, as usual, pretty stunning. While I miss such a beautiful landscape, this trip was mostly about my community. Not only those of you I did get to see, but also those of you I didn't get to see. My heart feels really full with all of you. Upon returning home, I also saw the familiar faces here in Lewisburg. This reminded me of the capacity the heart has to stretch and grow with more connections.

It seems fitting that I use that word "stretch"...

In yoga we think of the word stretch as a physical thing, as if the physical body is the only factor in stretching. However, the physical body is stretching and supple because it needs to yield and grow with the spirit. So todays alignment tip is about heart opening. What does it mean to open the heart both physically and emotionally?

Alignment Tip of The Week:

I love heart opening practices. I love designing them and doing them. Partially because the anatomy of heart opening is so interesting. I will walk you through some basic principles to heart opening that I hope will support you in your practice. 

The first thing to remember about heart opening is that it is an emotional state. It is in fact a choice. So entering a heart opener while guarding or retreating from the heart will never work. In a heart opener we are moving towards-not away from. 

In all heart openers (aka back bending asana), the heart is exposed. If you lift your arms straight up to the sky and then bend your elbows so you look like a cactus and draw the shoulder blades down the back, you will notice that your heart will open. This is because the shoulders are the doorway to the heart. If the shoulders come up by the ears they will close the front of the heart and the low back will round. If you draw the shoulders down the back then the heart and lower back  will arch up and open like you are reversing the letter "c". So backbending is about making sure the shoulders as well as the hip flexors are open. Try taking some sun salutations with warrior I and several rounds of plank to downward facing dog to warm up the shoulders. I also like to do a few lunges to get into the hip flexors. Once the shoulders are open you can move on to back bending. 

A really profound exercise to do with someone you love is to face each other standing with your feet hip distance apart. Have this person hover his/her hand right in front of your heart and keep it always one inch away from your heart. Next come back to your cactus arms and lean forward into your toes, feel the pressure in the front side of the body. Take a deep inhale and lift your ribs off of your hips, feel the ribcage widen and the heart puff up. As you exhale, press the elbows back and take a half backbend. Feel your heart press forwards towards this person in front of you, offer them your heart as the rest of you peels away in the backbend. This standing backbend will help you understand how much backbending has to do with heart opening.

The two foundational heart openers are bridge and wheel pose. Both of these poses start the same way: Lie on your back with the feet planted on the earth hip distance apart, the toes turned inwards and heels slightly out. Reach your fingers to see if they can graze the heels. This is because we want the joints to be able to distribute the burden of he backbend. 

For bridge pose (setubandha-sarvangasana), rest the arms on the earth and bend the elbows drawing the shoulder blades down the back and then return the hands to rest  on the earth again.

-Lift the hips off of the ground.

-Reach your knees away from you and roll the quadriceps inwards.

-Shimmy the shoulders underneath you and possibly interlace the fingers pressing the hands into the floor underneath your hips. Shut your eyes and reach the heart towards the space around you. You are pressing up into the front side of the body but relax your butt.

You may also do this pose with a block underneath your hips to stabilize the low back and make it more restorative. This variation is good for those who have a low back injury or hyper mobility in the back.

Wheel pose (urdhva dhanurasana) is a deeper bridge. For wheel, start the same as bridge send the arms to the sky and pretend you are grabbing a steering wheel, draw the shoulder blades down the back. Bend the elbows and bring your hands by your shoulders. Turn the wrists outward slightly. This will encourage the elbows to come into the ribs opening the heart. Inhale to the top of your head and then exhale straightening the arms. Again, make sure the toes and quadriceps spiral inwards. Reach the knees away and the heart in the other direction. You can try straightening the legs or raise the heels. Imagine you are reaching your heart into the hands of someone you love.

                                                                      &nbs…

                                                                                   (Hey that's me!)

The backbending practice is called "nadi shodhana" in the Astanga series. It clears the Nadi's or energetic channels. It balances the nervous system. A few years ago in an Astanga class, after a very difficult experience in my life, my teacher was spotting me in a standing backbend and he said to me, "Ariel, breathe into your wounded heart with abandon". It was the most amazing experience. I would like to impart these words to you as well,  "be in your heart with full abandon"... and do a backbend in the park before it gets too cold!!!

Upcoming Retreat: 

THE MINDFUL PRACTICE


With Ariel Howland and Jason Leddington

A 3day/2night retreat: February 3rd-5th, 2017

Mayacamas Ranch, Calistoga, CA                                                                                                                                                                                       

Every year, after the holidays, do you crave some self care? 

Simply put, self care and pampering is what this retreat is all about. Set in the extraordinary scenery of Mayacamas Ranch, nestled in the vineyards of Calistoga, join us on an oasis built just for you...

We will practice some yoga. Yoga which is meant to restore, and vinyasa classes to detox. (4 classes in total with Ariel). Each class will be unique; attending to your body, soul, and deepening your connection to the practice.

We will learn to meditate (2 sessions with Jason). Meditation is a tool for getting all blissed out and learning how to stay blissed out. Jason will be sharing with us tools specifically for stress reduction which you can take with you (*see below for Jason's bio).

We will eat REALLY, RIDICULOUSLY good food. We will chat and have a bonfire; we will build community.

You are welcome to enjoy free time; hiking, swimming in the pool or soaking in the hot tub, go local wine tasting or get a massage!! (because this is your oasis). 

WE are so excited to bring you to this deeply calming place. We are equally as excited to attend to you and give you the space to to feel nourished. 

Price of Admission:

  • $850 Single 
  • $700 Double
  • $550 Dorm (Yikes, sign up now these fill fast!)

TO REGISTER CLICK HERE.


(*Jason Leddington is a philosophy professor at Bucknell University where he incorporates mindfulness meditation into his classes. He has been studying and practicing meditation since 2004. He is currently doing his training in the Mindfulness Based Stress Reduction Method. )


Upcoming Workshops:

None at this time...

*Remember to check out the other amazing workshops that are happening at the yoga studios:

Yoga Dear

Lewisburg Yoga and Wellness Center

Studio B

As always

See you on the mat,

Ariel


How are you?


Dear Sweet Community,

How are you?

I wanted to check in and see how your yoga practice is feeling to you?

Over the 15 years I have been teaching yoga, people have shared with me their fears about starting a yoga practice or their longing for guidance in the practice they have. Some don't know how to start one, some feel intimidated to be in the classroom, and some want to practice at home but just don't know where to begin. I wonder if any of you are feeling this way? I care, and believe It is my job as a teacher and human being to make this practice accessible to you. 

The tradition of yoga is to cultivate a self-guided practice. Meaning just you and the opportunity to ask "what do I need?" What does my body need today?

But how do I gain the confidence and familiarity with the poses to practice in a studio or at home? Right about now you are thinking....well, that feels really intimidating to me. I get it! I do! its not your forte. Computers are not mine. And whenever someone tells me to "just ___." with computers I feel paralyzed. So I call up the genius bar (I LOVE those people) at the local Mac Store and I get a little individual guidance.

Why don't you try working one on one? A private yoga session is like going to the genius bar. It's an opportunity to gain some individual instruction and tailor a practice that really suits your needs. This is one of the most powerful ways to build a practice. And I love doing them!

Private sessions...
*Are an hour. Either in the studio or at your home.

*Address privately any questions you might have about yoga.

*Will discuss your injury and how to accommodate for it.

*Will be inclusive of any anxiety, stress or other emotional stressors that you would like to work with.

*Tailor an individual practice for you including your personal needs; meditation, physical strength, relaxation etc.

*Will feel yummy!!!

Because of my back ground as a somatic psychotherapist, I see these privates as holistic; together we develop a sustainable practice for you. One where you are really taken care of. After all, don't you deserve to be pampered? If you want to schedule a private with me (or simply say hi!) click here or call me at 805-450-4078.

Another way to feel more comfortable with a practice is to know the foundational poses. Please know that doing a few of the foundational poses is a yoga practice. Today I am going to talk about three different foundational poses that we did in my foundations class and highlight how they might develop into a self guided practice. 

Alignment Tip of The week:

Think of the poses as having lineages. Once you know the "mother pose" or foundational pose, then, since they build on each other, you can choose where else you want to go in your practice. We will go over some of the alignment of these poses here, but I want to stress that each of our bodies are different. THANK GOODNESS!! So there is no "right" way to do the poses. Again, if you want more detail, join me in class or a private to really explore your pose and comfort in it. 

The two mother poses I have chosen are Triangle (Trikonasana) and Warrior II (Virbhadrasana II). Both of these poses can be learned against the wall. You may use a block.

*Stand against the wall and step your feet two feet apart. Place the block between your right foot and the wall. Turn your right foot out so it is parallel to the wall and turn your left foot so it is perpendicular to, and with your heel against, the wall. If this hurts your knees bring your left foot a little away from the wall.
*Stand tall and press your whole torso and hips into the wall.
*Open your arms wide wrists in the same line as shoulders and begin to hinge at the hips towards the right foot.
*Press down through the left foot and micro bend in the right knee so you don't hyper extend in the knee. Lengthen the right ribcage as you come down.
*Rest your right hand on the block or your shin.
*Send the left arm straight to the sky and press it into the wall. Make sure your torso still makes contact with the wall. You should feel an amazing side stretch here. If you feel the stretch too much in the hamstring modify by pressing the torso into the wall and lift through the right quadricep. This is Triangle Pose. Take 5 breaths here breathing into the remarkable space you are creating in the left side seam of your body.

Then come back up to standing with your feet as they are. Again press your arms into the wall, and press your torso and hips into the wall.

*Now bend the right knee until it aligns with the right ankle. One rule of thumb when it comes to the body is that joints are stronger when they are stacked. So, in the mother poses, try practicing aligning the joints so in the more complicated poses, the joints are stacked and supportive. Once your joints are stacked, lift out of them by feeling your inner legs and core move up towards the sky. 

But I digress....you are now in Warrior II!
*Make sure your right knee is pressing towards the wall behind it so you are opening this hip. If this creates a twerk in your knee then move your right foot away from the wall a bit (while some teachers will say the right heel should bisect the left foot, I believe it depends on your anatomy. We are after an opening in the hip, not a stress in the knee). 

*To give you an example of how you can develop a practice from these mother poses; from your Warrior II, bend your right elbow and bring it to your right quadricep, or bring the hand to the block between the wall and your foot.
*Again, use the alignment tips from Triangle and Warrior II: press your torso, hips, right knee and left arm into the wall, press down through the left foot and energetically lift out of the right set of joints.  
*Reach your left arm up and over towards the right with the palm face down,  creating space for the shoulder blade. You are now in Parsvokonasana (Side Angle Pose)

By practicing the foundational poses, we start to learn to link poses together as they build on one another. Try incorporating these three poses into your daily life. Remind yourself that this is your practice, it is what you need and want. I am always here to support you in it!


Upcoming Retreat: 

I am SOOOOOOOOO excited! I will be coming to California!!!

THE MINDFUL PRACTICE

With Ariel Howland and Jason Leddington

A 3day/2night retreat: February 3rd-5th, 2017

Mayacamas Ranch, Calistoga, CA                                                                                                                                                                                       

Every year, after the holidays, do you crave some self care? 

Simply put, self care and pampering is what this retreat is all about. Set in the extraordinary scenery of Mayacamas Ranch, nestled in the vineyards of Calistoga, join us on an oasis built just for you...

We will practice some yoga. Yoga which is meant to restore, and vinyasa classes to detox. (4 classes in total with Ariel). Each class will be unique; attending to your body, soul, and deepening your connection to the practice.

We will learn to meditate (2 sessions with Jason). Meditation is a tool for getting all blissed out and learning how to stay blissed out. Jason will be sharing with us tools specifically for stress reduction which you can take with you (*see below for Jason's bio).

We will eat REALLY, RIDICULOUSLY good food. We will chat and have a bonfire; we will build community.

You are welcome to enjoy free time; hiking, swimming in the pool or soaking in the hot tub, go local wine tasting or get a massage!! (because this is your oasis). 

WE are so excited to bring you to this deeply calming place. We are equally as excited to attend to you and give you the space to to feel nourished. 

Price of Admission:

  • $850 Single 
  • $700 Double
  • $550 Dorm (Yikes, sign up now these fill fast!)

TO REGISTER CLICK HERE.


(*Jason Leddington is a philosophy professor at Bucknell University where he incorporates mindfulness meditation into his classes. He has been studying and practicing meditation since 2004. He is currently doing his training in the Mindfulness Based Stress Reduction Method. )


Upcoming Workshops:

The Blissful Practice: Yoga for Stress at Yoga Dear
Saturday, October 15, 2016 from 1:00 - 3:00 p.m.
Stress comes in all shapes and forms and is hard to shake. If you are  a person who has stress, and want to find a more easeful way to coexist with it, know that you are not alone- there are many of us out there! This workshop is a place for us to come together and learn tools to move through states of stress and anxiety. We will use breathwork (pranayama), poses designed for concentration and relaxation,  and meditation to undo deep patterns of holding in the body, which perpetuate states of stress. Students will be able to walk away from this workshop feeling deeply relaxed and nurtured.  Sign me up! Right?

What students will gain:

  • Pranayama practices designed for regulating the nervous system
  • Mindfulness Meditation
  • Somatic grounding techniques
  • Visualization techniques used for regulating the nervous system
  • Restorative sequences which also encourage regulation in the nervous system.

Students should walk away from the workshop feeling deeply relaxed and grounded in their bodies, and also feel empowered with easy, quick tools they can use when stress comes up in their daily lives. 

As always

See you on the mat,

Ariel

Greetings from The East Side

Dear Sweet Community,

Oh my gosh it has been a while! I miss you all and wanted to say hi. I am now living in Lewisburg, PA. A small town with farmlands all around. It is a big change from San Francisco. I want to welcome all of the Lewisburg folks to our newsletter, forum to geek out on yoga and other things, and to ask any questions you might have at the bottom of the newsletter. 

 I also got married! Wow! What a day. Jason and I were married on the beach with just a few people there.

What an amazing gift to be blessed with partnership in my life! So I have started to settle here, I am teaching in two local studios; Yoga Dear and Lewisburg Yoga and Wellness Center trying to bring a little city yoga to this quiet countryside. 

This relocation, while for a good cause, has been incredibly challenging. I have felt like someone shook the tree I was balanced in. In the past few months I have started deepening my practice of mindfulness. This has been the most predominant feature of my yoga practice. And really is the core of my work in all domains. Being with what arises, my sensations, has taught me so much about myself and how I navigate my situation. So I thought I might make this alignment tip on mindfulness meditation. 


Alignment Tip of the Week:

The art of self regulation is knowing how to resource oneself. In the meditation tradition,  this practice can be referred to as "mindfulness". In the somatic tradition, we refer to this practice as "tracking sensations or taking inventory". Both are compatible which is what I love about teaching yoga and being a somatic psychotherapist. Usually when I am teaching a class I tend to start with some mindfulness and incorporate it into savasana. But we can actually do an entire practice of mindfulness. 

It is important to approach mindfulness and somatic tracking with a curiosity. I am learning about the "don't know mind" and have to often remind myself to approach all things with the possibility that I actually don't know what this experience really is. If I am tracking sensations in my body, this means that I am being curious about them as if I am experiencing them for the first time. 

To start, either find a comfortable seated position, or try lying down on the earth on your back. Begin with naming three things you see in the room and describe their color to yourself. We do this to regulate the nervous system. In essence you are literally quieting the limbic brain (or the emotional brain) by opening the front of the brain (prefrontal cortex). And your nervous system will thank you for this! Once you have named these three things allow the eyes to float shut. Bring your awareness away from the room and now begin to focus on your breath. Notice how you breath feels. Is it consistent? Does it stutter? Where are you breathing? What does the inhale feel like? And the exhale? When we focus on our breath it is like an elevator that takes us down into the body. 

Next, begin to notice sensations that arise in the body. For instance, stiffness in the neck. Give these sensations a feeling tone; pleasant, unpleasant or neutral. You can also say, comfortable, uncomfortable or neutral. As you notice these sensations, apply your don't know mind to them. What do I mean by stiffness in the neck? What does that actually feel like? And when you find sensations, try not to fix them or change them. This is a practice of simply being with them. A word I use a lot as a therapist is "tolerance". I find that often, myself included, we all have a hard time tolerating discomfort. We aren't taught to tolerate it. We are  society of instant gratification, of pursuing the things we want and having the means to get them. But discomfort is a huge part of life. It comes in all forms and not all discomfort means something is wrong. So tolerating our sensations, whatever they may be, is incredibly useful for learning how to tolerate discomfort. 

Most likely sensations will keep coming back, and you may keep naming and giving, the same sensation a feeling tone. This is an important step because the feeling tone may change. The other important word that I refer to in my work with taking inventory, is "fluctuation". Everything fluctuates, and so do sensations.  Fluctuation reminds us that whatever we are feeling, will not be this way forever. This is the yogic principle of non-attachment. This is also incredibly useful with our life's experiences. 

As you continue your mindfulness you may notice yourself drifting into other thoughts. This is ok. When you can, redirect the mind back to your breath ad then your sensations. The mind wants to distract you away from sensations- it is afraid yo won't be able to tolerate them. 

Try your mindfulness for 5 minutes to begin with and then increase to 10minutes, then 15 up to 30 minutes. When you do this practice, you gain the capacity to resource through sensations and feelings. When they arise, you can simply take inventory of what you are feeling and notice that it is fluctuating.

I have my days (don't we all?!!!!!) and this practice really helps me! 

If you are hungry for more of the meditation yummyness (is that really a word?) then see below for my upcoming mindfulness and yoga retreat and workshops.

Try this practice and let me know how it goes!

Upcoming Retreat: 

I am SOOOOOOOOO excited! I will be coming to California!!!


THE MINDFUL PRACTICE

With Ariel Howland and Jason Leddington

A 3day/2night retreat: February 3rd-5th, 2017

Mayacamas Ranch, Calistoga, CA                                                                                                                                                                                       

Every year, after the holidays, do you crave some self care? 

Simply put, self care and pampering is what this retreat is all about. Set in the extraordinary scenery of Mayacamas Ranch, nestled in the vineyards of Calistoga, join us on an oasis built just for you...

We will practice some yoga. Yoga which is meant to restore, and vinyasa classes to detox. (4 classes in total with Ariel). Each class will be unique; attending to your body, soul, and deepening your connection to the practice.

We will learn to meditate (2 sessions with Jason). Meditation is a tool for getting all blissed out and learning how to stay blissed out. Jason will be sharing with us tools specifically for stress reduction which you can take with you (*see below for Jason's bio).

We will eat REALLY, RIDICULOUSLY good food. We will chat and have a bonfire; we will build community.

You are welcome to enjoy free time; hiking, swimming in the pool or soaking in the hot tub, go local wine tasting or get a massage!! (because this is your oasis). 

WE are so excited to bring you to this deeply calming place. We are equally as excited to attend to you and give you the space to to feel nourished. 

Price of Admission:

  • $850 Single 
  • $700 Double
  • $550 Dorm (Yikes, sign up now these fill fast!)

To register click here.


(*Jason Leddington is a philosophy professor at Bucknell University where he incorporates mindfulness meditation into his classes. He has been studying and practicing meditation since 2004. He is currently doing his training in the Mindfulness Based Stress Reduction Method. )


Upcoming Workshops:

Save the date of October 15th. I will be leading a workshop at Yoga Dear on Yoga for Stress and Anxiety. You will gain tools to feel less stress in your life. It promises to be a very relaxing 2 hours so plan to pamper yourself!


As always

See you on the mat,

Ariel


Motion is Lotion...

Dear Sweet Community,

I am really attached to my dreams. I am. And some of them have indeed manifested, others are still in the works. The more I allow myself to hope for these things, the more I notice my attachment to them happening. I don't think hoping and wanting are a negative thing. I think it is, to some degree, a demonstration of trusting life a bit. But when we start clinging to something, we suffer and our happiness becomes contingent upon it. As a somatic therapist I notice the somatic expression of clinging in me. It is a clenching in my jaw and a tightening of my whole body. As if my body is wrapping itself around this something that i am trying to so hard to have. 

It doesn't feel good. This causes me suffering. So I try to work my way backwards. When did I stop dreaming and start clinging? Dreaming is a part of being imaginative, this is an expansive state. Clinging is very narrow, it is the attachment to expectation; as in happiness can only come with a specific outcome.

Well geez, being a yogini is hard then! Because I have to keep sitting with my attachment to what I imagine is possible in my life. This is true because I am human and it is human nature to want safety and assurance. 

Lately I have been practicing allowing my reactions and emotions to freely arise as I practice yoga. This is a cleansing of sorts of all that lies in my humanity. At the end of my practice, I meditate when all of that rebellion is out and I watch the calm that comes with letting go. 

See if this might be a possibility for you on your mat. It is an effective approach to practicing non-attachment. 

Alignment Tip of The Week:

The past two Fridays we focused on the jump through and jump back and the joints.

The joints are a very important part of the body. They are like energetic stations in the body. Energy passes through the joints as part of the energetic flow. Energy is carried in winds, or Vayu's, through out the body. If prana can't pass through the joints it gets stuck. On an anatomical level, the joints are very important. The joints allow us an incredible amount of flexibility. Our bodies are an amazing machine, there is tremendous intelligence in them. However, like a machine, they need to be maintained. Like a nice car, the joints need to be oiled. Synovial fluid is the oil to our joints, if we don't move the joints around then our body produces less synovial fluid. So motion is lotion when it comes to the joints. Also, the joints are inherently very unstable. They really are bones and soft tissue that float around each other with some padding in between. What stabilizes them is connective tissue that is strong and doesn't entirely yield. If this tissue stretches out too much it will make the joints stable and cause problems for the other joints in the same line, contrary, if they are too strong they will limit our mobility in that joint and again affect the other joints in the same line.

Therefore, make sure you move the joints around, twirl your wrists, ankles, make circles in your hips and shoulders and knees. Stretch your feet in child's pose, knees in her pose, hips in pigeon, shoulders in downward facing dog but also do your chair pose to strengthen the knees, one leg balancing to strengthen the ankle and plank and chattarunga for the shoulders. Care for your joints and they will care for you ;)

The age old jump through and jump back demystified: The word Vinyasa means a moving meditation. When we breath we are doing vinyasa. This is because our breath carries our Prana (life force) in certain directions. The vayus are the directionals of Prana. When we breath in our energy goes up (Uddana Vayu) and out (Vyana Vayu). We feel this by the ribcage lifting and spreading wide, collar bones widen, and our limbs elongate. We also feel our pelvic floor gather up lifting our seat. When we breath out we are going down (Apana Vayu) and in (Samana Vayu). We feel our feet on the earth, the ribcage coming into the center, the front of the ribs drawing down and towards our back, and our abdominals engaging. When we are doing the traditional Ashtanga transition vinyasa we jump the feet to the hands and jump back to plank. We also jump the legs through to seated and back to chatarunga. In order to do this we need to use vinyasa of the breath.

tolasana-on-the-blocks.jpg

Try doing the jump through and jump back with a set of blocks. Bring the blocks by your hips and your hands resting on the block. Cross your ankles and lift your seat into Tolasana. Think IN and UP with your breath; point your chin forward as you lift your seat off of the ground. Then pointyour chin down causing your body to tuck and rock forward. Either set your shins on the ground and step back to plank and then down dog or keeping the shins off of the ground shoot your legs back to plank. In down dog walk your feet forward and inch or two, stay high in your hips as you come on to your toes and jump your legs through to Tolasana again and then sit on the ground. Remember this takes practice so bring an open mind and playfulness to it!! 

As always,

See you on the mat

ARIEL


Just Breathe!!!!

Dear Sweet Community,

First of all, let me apologize for my lag in newsletters. I have been traveling and my capacity to do my newsletters has been compromised. I feel this apology is very necessary since I have made a commitment to all of you, my Sangha (community). Without that dedication of all of us, the community begins to fragment. So I truly apologize for not reaching out to all of you and keeping up my end of the bargain. After all - you all show up morning after morning and practice. And because of your practice, we all feel energized and held, because of you the greater community feels the reverberations of your intentions. 

Being busy, is what congests relationship. I am aware of this as I write to all of you. As a somatic therapist, I am always telling my clients to breathe. Because just breathing drops us into our bodies and brings us into the present moment, commitment etc. So that is what we have focused on this past week and as I start this newsletter I shut my eyes and remind myself "just breathe Ariel.."

Alignment Tip of the Week:

The past two Fridays we focused on Vrksasana (tree pose) and Ujjayi and Kapalbhati breath.

Ok, I get it I should breathe but how should I breathe? What kind of breath do I need right now? In Yoga, we have the opportunity to use different forms of Pranayama (breath work) to manipulate our prana (life force) and nervous system. 

Imagine your sympathetic nervous system as the gas peddle in your car; it responds to stimulation and creates adrenalin. The parasympathetic nervous system is like the brake; it responds to safety and creates relaxation. The parasympathetic nervous system is turned on by the vegus nerve. The vegus nerve can be accessed and stimulated at various points in the body. By stimulating this nerve, we can move from being stressed in the sympathetic nervous system to being relaxed and calm in the parasympathetic nervous system. If you are feeling hyper stimulated and in your sympathetic nervous system, then you will benefit from Ujjayi breath. To do Uijayi breath, sit comfortably and breathe in through your nose and out through your nose. As you breathe open the back of the throat so the breath feels like it is making a vacuum. Try breathing in for 5 counts and out for the same. Uijayi breath is real diaphragm breathing. The vegus nerve passes through the diaphragm, and as this amazing muscle moves it massages the nerve and stimulates it. So Uijayi breath can be used to calm you. Just don't do too much Uijayi when you are driving a car ;)

If you are stressed and need a quick "reset" to your nervous system you may try a cleansing breath; simply breathe in through the nose and out through the mouth. Generally speaking exhaling with an open mouth is cooling and therefore calming and breathing out with a closed mouth is heating or stimulating. Another form of cooling breath is Sitali breath. For Sitali breath, sit comfortably and make a tube with your tongue (much like a hot dog bun). With your lips open breathe air in through your tongue, this will be cooling, and then release your tongue and breath out with the mouth shut. Repeat this for several rounds until you notice that you have cooled down. 

If you are feeling tired, relaxed, even sluggish, then you will want to do Kapalabhati breath. To do Kapalabhati breath sit comfortably and take a shallow inhale in through the nose, then push the air out through the nose with a snap of your belly. Keep repeating this. You will be focusing on the exhales and not the inhales. As you breathe keep pumping the belly. Be careful not to tense up your face, keep it relaxed. By breathing this way you are stimulating the body's response to oxygen. The brain "awakens" when there is less oxygen and becomes more alert, your sympathetic nervous system will be stimulated, producing cortisol which gives you more energy. So this is a good form of breath when you want to become more engaged in your environment. Be careful not to do this form of breath when you are stressed as it will make you more stressed. 

Choose a form of breath that supports your nervous system and meditation, both grounding you and increasing your alertness for meditation.

Breathing is one way of grounding, so is one leg balancing. Vrksasana, tree pose, is meant to mimic the grounding quality of a tree; we use our roots to steady us while being limber enough to move with the subtle winds of our environment. 

While tree pose may seem simple, it challenges us to find our center. To do tree pose, stand with your feet together. Bring your right knee into your chest and bring it out to the right. Open your arms wide in a T shape and lift the right knee towards the right elbow. Take the right foot with your hand and either place it on the inside of the left leg high up by your pelvic floor, or right above or below the left knee. Then press your right knee back and down towards the floor. As in all balancing poses, spread the toes of the left foot and feel the four corners of the standing foot. This is your roots. Pull up along the inner legs feeling the shins press in and the quadriceps roll out. Feel the ribs lift off of the hips and the front of your ribs close anchoring your torso in a solid, straight and sturdy trunk. Then allow your hands to float wherever they like creating the branches of your tree. 

If you like, you may try shutting your eyes. Turning your gaze inwards and trusting the grounded roots of your standing foot and the unwavering anchor of the core and trunk. Breathe into any wobbling as the breath helps us to recover like the bending tree in the wind. Play around with your faith in your capacity to weather fluctuations and come back to your center. Tree is very good for grounding us. 

As always,

See you on the mat,

ARIEL


Going upside down.

Dear Sweet Community,

During pride I walked home from NOPA to Noe Valley through the Castro. It was really warm outside so I meandered taking my time. I encountered such infectious joy. And I thought about the right to love whomever we want. No one tells me I can't love my mom or my sister or even my friends. So why has it even been an issue who we can love romantically?

I remember one time when my grandma told me that she would rather I marry a Jew because we are Jewish and we have to stick together because of the discrimination we have endured. I was reactive. Love is love; the heart doesn't discriminate. But that was naive, society, does discriminate. Marginalization hurts and creates more of it. 

I am just so happy that I am seeing change in my lifetime. As a Yogi, I hope to mitigate suffering, not cause it. I think our country took a huge step forwards. That is not to say that damage hasn't been incurred and there is subsequent healing to be done. It is to say that I am humbled to see the way this country has been forgiven for its huge ignorance and the resounding reaction I encountered on my walk home was joy. Pretty awesome of you ask me :)

Alignment Tip of The week:

The past two Fridays we focused on Parsvottonasana (Pyramid Pose) and inversions in the proper order in which to learn them. 

So Parsvottonasana or Pyramid pose is a deep forward bend. The alignment of this pose is in the warrior I family. To enter it bring your right leg forward and make sure your feet are on separate train tracks so your legs are in the same line as your hips. Spin your back foot in 45 degrees like warrior I. Take a moment to bring your hands to blocks or tent your fingertips on the earth and straighten your spine parallel to the earth. As you do this, square off your hips like a tabletop. Press down equally through both heels and feel that energy draw up through the inner legs. Press down through both big toes and pinkie toes at the same time. Then exhale feeling your belly tuck beck and up and fold forward into a forward bend WITHOUT curving your spine. Pyramid not only stretches the hamstrings, but because of the warrior I position in the feet, it stretches into the psoas and the low back and outside of the hip. I like to do pyramid even if I only have a few minutes in my day, because of its more comprehensive quality to stretching :)

Inversions are meant to revitalize the brain and to turn our perspective upside down. After all, if it isn't working right side up; then try turning it upside down! Inversions require a lot of core. Think of your arms and legs as scaffolding and rutters and the core being the stabilizing unit. The cervical spine, or neck, is very fragile. Therefore, we want to make sure that we understand going upside down without weight on the head before we do headstand, weighting the head. In all three inversions the alignment principles are as follows:

Start by standing and drawing your shoulder blades down your back so the shoulders are stabilized. This means you have a stable foundation and won't collapse into your neck and backbend. Next, zip the midline by starting with the inner legs, lifting the pelvic floor, knitting the front of the ribs and engaging the core. 

handstand.jpg

Handstand comes first because there is no pressure on your head. Handstand requires us to use our arms wisely. Remember that in handstand you need to press down through your hands to lift to the sky. Placing the hands on the earth lift one leg to the sky, rock back and forth gaining some momentum and then lift up into handstand against the wall. Practice keeping your shoulders down your back and pressing through the arms. Reach through your legs knitting the midline. In handstand there is no pressure on the neck so you can really practice lifting out of the earth. Use your legs as an extension of your hands. 

After handstand try Pinchamayurasana (forearm stand). Forearm stand is less stable than handstand. While the head is still off of the ground, there is more pressure put on the shoulders. Bring your arms into cactus arms and squeeze them in parallel, then place them on the floor. Really press down through the forearms to lift out of the shoulders. Tuck your toes under walking the feet in and follow the steps for handstand to lift up against the wall. In forearm stand you will be challenged to keep the shoulders down the back and not backbend which will ultimately keep pressure off of the neck. Try really mastering this shape. 

The final inversion is Sirsasana (headstand).  This is the most advanced of the inversions because of the pressure on the neck. To enter Sirsasana, come to cactus arms and place your forearms on the ground. Then interlace your fingers with one pinkie finger crossed in front of the other (not underneath). Just like the other inversions press down through your forearms drawing the shoulder blades down the back. Straighten your legs and walk your toes in, try coming up through a tuck and resting your feet on the wall, then straighten your legs. You should feel very little pressure on your head and neck. You should feel like you can lift your head off of the ground like forearm stand. In headstand you are using the skills you have developed from the prior inversions; strength in your arms and core, lifting out of the neck by anchoring the shoulders down the back rather than collapsing them, and knitting the midline. 


Remember inversions are for exploring a new perspective, approach them from a place of curiosity. Please resist advancing through the inversions until you have really mastered each one and are confident that you can control the amount of pressure on your neck. 

As always,

See you on the mat,

ARIEL


Party Tricks...Partying Yoga Style.

Dear Sweet Community,

Its been a pretty exciting week for me. I decided I was ready to try bouldering and lead climbing again. As many of you know, I fell abut 14 feet bouldering and shattered my heel bone, tearing out the cartilage in the subtaler joint. Its not that I ever was scared to climb again, its more that I had this mentality of protecting my foot. For most of my recovery there have been varying opinions on what to do and when to do it. In the back of my mind there has been the possibility of developing a mental block; a profound fear of falling. I have been internally grappling with this. How do I honor my own recovery and not let fear get the best of me? I decided to trust myself. I listened to my own voice. I tried bouldering and purposefully jumping off at 6 feet. And...it was scary! Jeez it was scary. But also wonderful. Since that had gone well, and I realized that I can trust my foot to take more impact I decided to take a few lead falls. That was a bigger feat, because if I had missed the first two clips I would have taken a big fall to the ground. But that is just it; if we are trying to protect ourselves from the uncertainty, well we will be a nervous wreck. I thought about all of the times the word "fall"is used in othe English language. We "fall" in love or we "fall" for it for example. There is a reason this word is used often. Because sometimes we just blindly let go and see what happens. 

Words cannot describe how it felt to be scared, (not scared in a "what might happen" way but scared in a "it did happen" way) and do it anyway. I kept focusing on the mantra I have had as a climber:

The only thing to fear is fear itself.

This is why I fell in love with rock climbing in the first place- I could work with my fear and master it. But I also was reunited with a part of myself that I had missed. Only now while I am interested in climbing hard and taking the risk, there is something wiser and kinder in my body. Something more intentional and careful. 

So here is the moral for me; if life doesn't provide me with challenges, then I won't get to earn the sweet satisfaction of overcoming them. I love returning to this sport even more now. Because it is challenging my character to recover, and not see myself as injured. I am reminded to trust the strength and health of my body. And I am reminded that not every "fall" is a bad one :)

Alignment Tip of The week:

The past two Fridays we explored one of my favorite party tricks, Tittibhasana (Firefly pose) and the Bandhas (energetic locks). 

We can't do much in yoga without the bhandas. The bandhas are energetic locks, they keep prana in certain places. Because we are moving Prana up the Shushumna Nadi, from the unconscious self to the self that is awake and free from suffering, the bands help us stay in more conscious states. 

Mula Bandha is the root lock. Its anatomical reference is the pelvic floor. As with all bandas, we engage them by softening into the muscle. To find Mula Bandha, sit in a comfortable cross legged position and cultivate Uijayi breath. As you breathe, relax the pelvic floor. Breathe in and feel the pelvic floor lift like you want to lift yourself off of the floor. As you exhale feel the pelvic floor gather like it is capturing energy and lifting it up and not letting it pool into your legs. This is not a squeezing, it is simply a lifting. 

Uddiyana Bandha is the lock found in the core. Its anatomical reference is the abdominals. To access Uddiyana Bandha try lying down on the floor with you knees bent and feet on the floor hip width apart. Bring your hands to your quadriceps low by your hip points, fingertips facing your knees. Take a deep breath in and relax your belly as it fills with air making a "buddha belly". As you exhale breathe through the mouth and push your hands into your quadriceps and let the belly empty organically. Remember you are not "tensing the belly" instead let it empty and soften. Once all of your breath is out, retain the breath and, without inhaling, sip the lowest belly down a little more and let it move up towards the top of the back ribs. Again, the image of locking energy higher towards the heart bring this lock to life. 

The Bandhas lift us out of the force of gravity and they allow us to be stable in otherwise unstable positions either on our hands or feet. They are essential in arm balancing. 

Tittibhasana is sure to make people take pause at your next bbq. To do this pose you need open hamstrings and hips. Start standing with your feet a little wider than hip distance apart. Bend your knees bringing your shoulders inside your knees. Reach your thumbs to the back of your heels and shimmy your shoulders underneath your knees. Then reach your hands behind your feet. you will have to lean into your hands with the palms flat and fingers facing your heels. As you do this your heels will come off of the floor. You will be essentially resting your legs on your upper arms. Try crossing one ankle on top of the other. If this works, try straightening your legs. Squeeze the elbows in and use Mula Bandha lifting your pelvic floor. This will keep the inner legs pulling in and up. The full pose is legs towards the sky. 

And voila, you have a little something in your back pocket when the party seems to be getting a little blah...happy summer!

As always, 

See you on the Mat,

ARIEL


Lets talk stability to the spine!

Dear Sweet Community,

Oh joyous rain! Yay for the rain it makes me so happy to know all of the living beings are getting the hydration they need. Being a living being is a huge responsibility. The more we know about our bodies, how they work and what they need, the more we can enjoy the amazing time we have on this planet. On Alignment Fridays I strive to really give you the tools to care for your body and do your own practice. I don't know about you, but I feel like the body is pretty amazing and learning about it helps me feel empowered. 

So lets get right to it shall we?

Alignment Tip of The Week:

The past Two Fridays we talked about Nutation and Counter Nutation to the spine and we worked on one leg balancing.

The spine has a natural "S" curve to it. The low back arches slightly (or is lordotic) and the upper back ever so slightly rounds (or kyphotic). We should neither try to exaggerate the S curve nor eliminate it. When the pelvis tilts to make an arch in the low back, it is called nutation. You can find nutation of the spine by standing with your feet hip distance apart. Turn you feet in slightly and press on the big toe side of your legs. This will roll your quadriceps in shortening the psoas muscle and elongating the hamstring arching your tailbone to the sky. You will feel how this creates a back bend and leaves the top of the hamstrings vulnerable to a stretch. 

When the pelvis drops and rounds counteracting the arch in the low back, this is called counter nutation. To find counter nutation, take your same stance standing only this time turn the feet out slightly so the quadriceps roll outwards shortening the hamstrings and lengthening the psoas muscle. You will feel weight in the low back. 

Obviously nutation and counter nutation equalize each other. There are a few poses where it is important to use the alignment tips of both to find stability:

Take that same position standing but bring your feet parallel and hip distance apart. Place a block between your legs high up. Bring your hands to your hips and press down through the big toes so the quads roll in a bit. Fold into a forward bend and release your hands to your shins or the floor. Now lengthen your spine and press down through your pinkie toes. Notice how this engages the top of the hamstring so you can't overstretch them. Still pressing through the big toes so the quads roll in, lift the inner arches of your feet and feel the shins press out. This is an example of nutation and counter nutation at the same time. 

The same is true with back bending. While we want some nutation back bending, we also want to press down through the pinkie toes and keep the feet parallel or even slightly turned in during bridge and wheel. This is to protect the low back. Using nutation and counter nutation also helps us in high lunge and well as one leg balancing. 

Leaning into the pinkie toe side and lifting the hip- incorrect.

Leaning into the pinkie toe side and lifting the hip- incorrect.

Now try standing at the back of your mat with the block between your legs. Come to chair pose and with the knees bent start walking up the mat. This will remind you to use your inner legs and core as you transfer your weight. Once you reach the top of your mat remove the block and find chair pose, this time lift your right knee to your chest in chair. Plug down through the left big toe and pinkie toe at the same time, anchoring the ankle. Shift your chest parallel to the earth and extend the right leg back and the arms forward for warrior 3

Leaning into the big toe side-incorrect.

Leaning into the big toe side-incorrect.


Often people will lean into the pinkie toe side of the standing foot here, fatiguing the gluteus muscles…ouch! To fix this square off the hips. Also, avoid over leaning into that pinkie side of the foot and therefore over exerting the hamstring. Try keeping the left knee softly bent so you don’t lock out and lean into the heel.  Keep your spine neutral by energizing through the right heel and pulling the belly in avoiding over nutating or counter nutating.


Correct Warrior 3

Correct Warrior 3


Take this information about your own body and experiment with your s curve, try rocking your pelvis and loosening up the low back and try balancing in Warrior 3 to stabilize your back :)


Have a sweet day,

See you on the mat,

ARIEL

Its not WHERE we are going but HOW we get there....

Dear Sweet Community,

Wow, last week I got really sick. I apologize for not sending a newsletter out but I was so feverish I really couldn't do anything but sleep. It felt like my body was burning through anything toxic in my system. Once again, I have had to slow down and listen to what the bigger picture is here. I keep thinking about how every time I attach to getting to some "goal" in my life, I find myself hitting a detour. It's not that it is a detour per say, it's that I am so attached to it looking a certain way that any deviation from that I interpret as a detour. Here I am again with a reminder that it is not WHAT I am headed towards that will give me contentment, but rather the JOURNEY of getting there. I always reference in times like these one of my favorite books "The Alchemist". The story speaks of our truest fulfillment being in our backyard, it is and has always been with us. So it is not WHERE we are headed to find it, but rather HOW we walk the journey of connecting to it. 

Alignment Tip of The Week:                                                                                                                            

The past few Fridays we focused on our propensity to have a twisty pelvis, going upside down in Pincha Mayurasana (Forearm Stand) and The traditional transition of the jump through and jump back. 

Everyone's pelvis slightly twists to the right. This is because the right lung is slightly bigger and the heart is on the left. Because of this we tend to protect the left side and breathe into the right. The right energetic channel is the masculine or the protector and the left is the feminine or the nurturer. To work with your twisty pelvis, lie down so you are perpendicular to, and facing, a wall. Bring your hips against the wall and your legs up the wall. Bend your knees and press both feet into the wall so your shins are parallel to the floor. Place a block between your knees and quadriceps and squeeze the block. Press your right hip forward and your left hip back. Try this a few times. This is working with habitual patterns of holding in the pelvis. Try in poses like Virabhdrasana I (Warrior I) to bring your feet wide enough on separate train tracks to really work on squaring off the pelvis and unwinding the twisty nature of the pelvis. Other poses such as pyramid pose and low or high lunge can also really address the twisty pelvis by pulling the back quadricep forward and pulling back through the front heel and hip. 

Once the hips are aligned so too are our other joints. Having the joints "stacked" is a very important part of standing. We balance on our feet by finding our bones stacked on top of each other. The same is true when we invert. We must stack our joints upside down. For Pincha Mayurasana, face a wall and sit on your heels. Bring your arms out wide in a T and then bend your elbows with your palms facing the wall. Now anchor your shoulder blades down the back and press the elbows back without opening the front of your ribs. Bring your forearms parallel and place them on the earth with a block between your elbows. With the palms flat onto the earth, press down through the forearms and pull your shoulder blades down the back. Tuck your toes under and straighten your legs like down ward facing dog into Dolphin pose. Press your chest back towards your toes. Try lifting your elbows and the block off of the ground and bring them back down. This will encourage you to keep your elbows in line with the shoulders. After a few rounds of this exercise, slide your hands and elbows back so that the block is between your thumbs or remove the block. Walk your toes in a bit and lift the right leg towards the sky. Rock onto the left big toe and rock backwards and forwards until the left foot lifts to the sky. REACH both legs up to the sky and squeeze them together. Think of someone or something that inspires you and reach out in all directions while you reach down through the arms and in with your belly. Let your legs rest against the wall if you need to. To come down by lowering one leg at a time. 

Remember that inverting requires that the bones be aligned with the core supporting them. Do not backbend. Even if you don't get off of the ground practice standing on your forearms the way you stand on your feet; in control and confident!

                                Tolasana

                                Tolasana

                           Lolasana

                           Lolasana

Lastly, we take the principles of going upside down to our transitions. Remember that it is not about WHERE we are going, but rather HOW we get there. To jump back from seated, start with your ankles crossed and the knees bent. With your hands on blocks framing your hips, press your hands onto the blocks and lift your hips and maybe ankles off of the ground into Tolasana. If you get up lean your chin forwards and bring your feet through your hands for Lolasana. Maybe gently land on your shins and then jump or step back to plank. Or tap the bottom toes to the ground and jump back to plank or preferably chaturanga. The final variation is to not tap your toes on the ground and jump straight back. To jump back through to seated, come to downward facing dog and walk your feet about an inch closer to you hands. Come on to your toes and bend your knees. Lift your tail bone to the sky and think about stacking your joint; hips over shoulders and shoulders over wrists. Take a shakti jump- jumping to a half handstand with the knees bent and trying to balance here. At the very top of your shakti jump, cross your ankles and lower yourself to tolasana and either to seated or stretch your legs out in front of you hovering off of the ground and then lower down for the final pose. 

Jumping the feet to the hands from downward facing dog is really just jumping into a shakti jump and lowering the feet by the hands. Jumping back from a forward bend is a done by jumping up to a half handstand and shooting the legs back. One you learn these transitions you can come into a full handstand for EVERYTIME you find tolasana and a shakti jump. 

I encourage you to really find these transitions. They remind us to be intentional about how we are moving through our present moments and they discourage us from getting attached to some moment in time, some fantasy of what will bring us happiness. It is here, is this moment. It is in slowing down our actions so we really savor challenges and moments when we feel fearful. This is where we find what we are made of!

Have a sweet day,

See you on the mat,

ARIEL


Taking flight...

Dear Sweet Community,

I am saddened by what happened in South Carolina this past week. My mind keeps on traveling to the complexity of human relations and the helplessness I feel when we hurt each other so profoundly. Perhaps our spiritual practices help us to feel like we are doing our part. They give us faith that there is a way we can affect positive outcomes in our world. As a yogini, I believe in sending energy to another. I often hold people I am having a hard time with or I know are suffering in my heart as I do my practice. This is called sending metta to others. I know that some of the reason I do this is because it is part of what I CAN DO and that feels comforting. I also practice slowing down and listening to others. This is my greatest meditation. There is a growing chasm in our country, where the sensitive topics become so hard to talk about that dialogue can't happen. Now more than ever we need to forge these conversations and share experiences. We need to trust one another enough to offend and be offended. Because the other option is a world where we look the other way, where we don't understand one another, and where we simply forget that our unified blessings can hold a mourning loved one or create peace. 

Alignment Tip of The Week:   

The past two Fridays we worked on Utkatasana (chair pose) and Bakasana (crow). In some ways these two poses go really well together. Chair pose is grounding through your feet and Crow Pose is grounding through your hands. 

To do Utkatasana begin against the wall with a block between the legs right by the knees. Bend your knees so they are stacked over your ankles with your spine against the wall. Reach your hands out in front of you and push your shoulder blades into the wall. Then reach your arms up to the sky keeping the shoulder blades down the back. Feel the dynamic tension around the knees. This pose is meant to strengthen the ligaments around the knees. Once you feel this alignment, stand away from the wall with your feet together with the big toes touching and the heels slightly away. As you bend your knees, bring your weight into your heels. Putting your weight in to the heel with your knee over the ankle will help you understand the alignment for other poses like high lunge. First bring your arms into cactus arms and really pull the shoulder blades down the back. Then send them to the sky keeping the shoulder blades down the back. Make sure that you are comfortable in chair. Let your tail bone drop naturally but don't take the organic "s" curve out of the spine. Once you have found that ligament for chair, you can't twist chair and use it to enter arm balances.

Speaking of arm balances, one of my favorite is Bakasana. Crow pose is the foundation for all other arm balances and inversions. Crow teaches us the importance of the core. Lie on your back and bring your shins parallel o the earth. Then bring your big toes together and knees flare apart. With your hands interlaced behind your head take an inhale and on the exhale curl your shoulders off of the ground. Staying here reach your arms so they press on the inside of the knees and the knees press into the arms while flexing your wrists. You should feel your core working here. This is the shape of Bakasana. Try the same thing but in figure four with eh right leg first. Interlacing the fingers behind your head, lift the shoulders on an exhale. Then reach your arms out hooking the right foot around the left arm. This is your flying crow. Lastly try twisting to the right on your exhale with the shins together and parallel to the earth, and extend the arms out to the right- this is your side crow. 

Before entering crow find a chaturunga (or the bottom of a pushup). Remember the elbows squeeze into your sides and the shoulder blades come down the back. Now, all variations of crow and arm balances are a chatarunga in your arms. Stand on a block and flare your knees wide as they bend. Clamp your knees on the outside of your arms. Plant your hands on the earth shoulder width apart and rock your shoulders over your wrists. Squeezing the elbows in, lift one set of toes off of the ground and then the other. Squeeze the big toes together as your gently life through the inner legs. Think of some thing that makes you take a big inhale in (to me it is being 200 feet up a rockwall in Yosemite ;)

For flying crow come to a standing figure four and plant your hands on the earth. Wrap the right foot around the left elbow. Remember your are in chaturunga in your arms. Lift the left foot off of the ground and then try straightening the leg. Repeat to the other side. 

Lastly, for twisted crow come to a squat with your legs together and twist to the right. Really work your left elbow on the outside of the right knee and then plant your hands on the earth. Lean forward with your feet coming off of the ground together. At first you can use the right elbow as scaffolding, resting your right ribcage on the elbow and bringing your right cheek to the  earth. As you get more advanced keep your head off of the ground. Repeat to the other side.


Remember that whether you are grounding deeply in to the feet or taking flight off of the hands, this practice reminds us to come back to slowing down and really being present with ourselves and others. 


See you on the mat,

Have a sweet day,

ARIEL


Head, Shoulders, Knees and Toes...

Dear Sweet Community,

So we jumped back an hour for daylight savings. I love that feeling at the end of the day when there is still some light before twilight. I have been appreciating the time to meander home and watch people as their day ends; children skipping while holding their parent's hand, dogs being walked etc. There is such comfort in seeing everyone slow down with me. These are not my children or my dog but I feel connected to the joy of them in my life. 

Yoga teaches us that we are a part of something larger than ourselves. This is related to the yoga of service. We are of service to our greater community. This is also true when it comes to the body. Each joint in our body is of service to the rest of the body. A practice that focuses on the joints is like taking the time to really see all the people who share this community with you. I have always said the body is a community; your knee is in relationship with your hip. And we are not isolated beings. We are deeply attachment oriented. 

So as much as I love my sunny afternoons where I can slowly find my way home and pass all of my fellow community members gardening and grocery shopping, I do really hope it rains so that we can sustain our community. Maybe next week we will do a rain practice sending metta to the earth!!!

Alignment Tip of The Week

The past two Fridays we focused on the cervical spine (the neck) and the joints of the body.

The cervical spine supports the head. Like all vertebra, there are discs between each vertebra which allow some cushioning and space. It is important to make sure these discs don't get compressed. The muscles of the neck are quite delicate and do not need a lot of pulling. To stretch the neck you can take a strap behind the head in line with the tops of your ears. Holding both sides of the strap, on an inhale, pull evenly forward as you press the back of your head into the strap and release on the exhale. Repeat this three times. Turn your head to the right and, on an inhale, pull both sides of the strap as you press the left side of your head into the strap and exhale release- repeat three times and then switch sides. Lastly, with the head center, pull straight down with both sides of the strap and stay for a few breaths. 

Sirsasana (Headstand) is known to stimulate the brain and the last of the chakras which is our wisdom and bliss center. I think the biggest misconception is that all of the body weight is supposed to be on the head and the neck. This is not true. Headstand is the hardest inversion because you have to use your core to stay OFF of the cervical spine which is very delicate. Remember, there are discs between each vertebra which can bulge if there is too much compression on the neck. 

To do headstand face the wall an all fours and drop your elbows onto the earth. Measure the distance of your shoulders by bringing opposite fingers the each elbow crease and then interlace the finger with your pinkie fingers stacked in front of each other instead of crossed. Tuck your chin in and bring your head onto the earth so the back of your head rests in the hands. Straighten your legs. Feel your shoulder blades pull down your back so that they are trying to kiss in the middle and press down through your elbows. See if you can lift your head a tiny bit off of the ground. This is to remind you not to rely on the neck to hold you up but rather pressing down through the arms, stabilizing the shoulders and drawing the core in. Bring one leg to a tuck and then the other gently landing both feet against the wall with the knees bent. Now knit the front of the ribs in and use your core to lift out of the neck and straighten your legs. Immediately glue the legs together and reach through your feet! The more you reach up and out of the shoulders and neck the more you protect the cervical vertebra. Headstand should be comfortable and activate the top of the head without hurting the neck. 

After headstand take Salamba Sarvangasana (shoulderstand). I like to take a yoga blanket and fold it in quarters. Take the folded side and face it towards the top of your mat, fold your mat over the folded blanket. Lie on your mat with your shoulders about an inch in from the edge of the folded blanket. Your head will come onto the floor. Don't get too close because your weight will shift forward more when you life the legs to the sky. Bring your knees into your chest with your hands under your hips with palms flat. Rock backwards and forwards a few times until your legs come up and over towards your head. Bring your hands to your low back, fingers pointing up to your sacrum. Shimmy your shoulders in and send your legs to the sky. Lean your weight into your hands so you are staying with weight on the shoulders and not he cervical spine. This pose stretches the neck and cervical spine but it should not put pressure on it. DO NOT turn you head side to side, keep it straight. After a few breaths bring your legs back down and enjoy plow pose and slowly unwind to lying on your back with the legs straight. Tuck your hands underneath your hips only halfway with the palms flat and prop yourself up on your elbows allowing your head to tilt back and the chin to tip to the sky for (fish pose) which is a counter stretch in the neck to shoulder stand. 

Doing these poses can open up the neck and the gateway of communication. Just remember to be mindful of the cervical spine and it's delicate nature :)

The vertebra are each a joint. They are a member of a community of joints in the body. All of these joint are engineered to work together. Like the joint in a car, there is a fluid called synovial fluid which acts like oil lubricating the joints. All of our joints are made of bone, cartilage and soft tissue (tendons and ligaments). Some joints like the hip are a ball and socket joint, some are more a threaded joint like the scare-iliac joint and some are more a hinge joint. The shoulder joint has the least amount of bone and is mostly compromised of soft tissue which makes it very flexible. 

To care for our joints we need; strength, flexibility and traction. To warm up the joints get them moving in circles if they are ball and socket, or back and forth is they are hinging. The point is to get the synovial fluid moving. A nice exercise is to bring the feet together and come to chair pose bring your hands to your knees and move them around in circles in one direction and then the other. This will get the synovial fluid going in the ankles, knees and hips. Be aware of your joints, we don't always want to just stretch the ligaments and tendons attached to the bones of the joint, this makes the joints unstable. If you are hyper mobile in a particular joint you don't need to stretch it, you actually need to strengthen it. You can stabilize joints by placing them in alignment with the other joints and by activating the bones in their socket, meaning don't pull joints out of their socket in traction keep them in the socket and use the muscles around them to get stabilization. For example, bring the shoulders blades down the back in plank to strengthen rather than letting them float away and create instability in the shoulder. 

A joint practice each morning can really wake up your body together as a community of working parts and promote holistic health in the body for many years. 

I look forward to seeing you all on the mat,

Sweet Day,

ARIEL

Unwinding...

Dear Sweet Community:  

Big changes! I am so excited my new website is up and running. I really see this website as a chance for our community to really interact with each other. All of you may comment on each alignment friday newsletter, ask myself or each other questions, discuss what you want from this specialized class or simply add your own information to what I have written. I also have a more general blog post on my site and it is an opportunity for me to talk more about my own personal journey with yoga and meditation and also to talk about my work as a somatic therapist and how I integrate that in my life and teaching. So I invite you to read the blogs and comment on them as well.

As for me, well, today I got a screw taken out of my foot. It was really bothering me and interfering with my achilles tendon and mobility in my joints in my foot. Going into this procedure I knew it would be uncomfortable. More psychologically (though it freaking hurt when he took it out don't get me wrong!) than physically. So this is relevant because this past Friday we used breath work for the nervous system. I lay on that table and shut my eyes and visualized my foot happy and thriving without that pesky screw. I used my breath, deeper uijayi breath too regulate and then cleansing breath to discharge energy from the nervous system. As I felt my stomach get nauseous I kept tracking what I saw in the room and breathing deep diaphragmatic breaths, keeping the prefrontal cortex of my mind open. This is how our practice of pranayama SERVES us in our life. We belong to this practice and we serve our bodies with it. This is a commitment but it is really rewarding. I feel calm as I write this, my body is going to heal faster because my nervous system is regulated. This is the generous gift I gave to myself today; as you do every time you step onto the mat :) 

Alignment Tip of The Week

The past two Fridays we focused on Tittibhasana (firefly) and Pranayama (breathwork)

To do Tittibhasana, you need open hamstrings and hips. Sit with your legs open wide and forward bend. Then do the same thing with your legs together. Try coming into a runners stretch with the right foot forward and your left leg straight in a lunge. Weave the right arm under the right leg, placing the hand on the outside of your right foot. Lift your hips here slightly. You can bring your head behind the right ankle if it is available to you. Once you have done both sides, stand at the top of your mat with your knees and feet set wider than your hips in a forward. Place a strap resting on your tailbone; reach you arms on the inside of your legs and grab the strap so your hands are reaching up towards your tail. Try wiggling one shoulder and then the other inside your legs and then try straightening your legs. Do this until the shoulders are behind your calves as much as you can. Next, bend your knees and hold onto the back of your heels with your hands and squeeze your knees together. Then place your hands behind your heels a few inches, fingertips facing the top of the mat. Rock your weight into your palms as they lay flat on the earth, lift your feet of off the ground and try to touch your big toes, if you can do that, press down through your hands and try straightening your legs for full Tittibhasana. 

Yoga is divided into several different practices. Asana is not the only one. Pranayama is a very important part of the practice. In order to do asana we need to understand how the nervous system affects the soft tissues of our body and how breath affects the nervous system. 

For the sake of brevity, think of our nervous system as a self regulating system that keeps shifting between two modes of response; the sympathetic (fight or flight), or the parasympathetic, (rest and digest). When there is stress we go into sympathetic response and the nervous system tells all of the soft tissue of our body to tighten and become responsive to action. When there is no threat we are using more our parasympathetic, in which case the nervous system tells the soft tissue to release into more elastic states. The two are not mutually exclusive.  In yoga the nervous system closely correlates to the nadis  or energetic channels. The Pingala Nadi is the solar masculine and is related to "the gas peddle" or the sympathetic system. The Ida Nadi is the lunar feminine and is related to the "brakes" or parasympathetic nervous system. There is a nerve that wanders through the center of the body called the vegus nerve. and can be stimulated by the diaphragm. The veggies nerve triggers the parasympathetic response. The vegus nerve correlates to the Shushumna Nadi or the middle energetic channel. 

There are several forms of Pranayama that work with the nervous system. Start in a comfortable crossed legged position with your spine straight and eyes shut:

Uijayi- Breathe in through your nose to the sound of "so" and open the back of your throat as you breathe out through the nose to the sound of "ha". Uijayi is diaphragmatic breathing. As the diaphragm squeezes and opens it stimulates the vegus nerve creating more rest in the nervous system and elastic soft tissue.

Nadi Shodana- As it's name infers, this pranayama works with balancing the Ida and Pingala Nadi's. Take the right hand to your forehead and press the first and middle finger into the third eye. Rest your pinkie finger by your right nostril and close your left nostril off with your thumb. Breathe in through the right nostril for 5-8 counts and then close off the right nostril with your pinkie finger. Hold the breath for 5-8 counts and then release your thumb and breathe out the left nostril for 5-8 counts. Next breathe in through the left nostril, close it off and hold the breath, and then release the right nostril and breathe out. Continue breathing this way. Because the right is the sympathetic and the left is the parasympathetic, you are balancing the functions of the nervous system which means that you are creating a regulated nervous system. The effect is very grounding and calming. 

Kapalabhati Breath- This is heating breath. It is used to stimulate the nervous system and awaken sleeping prana, Some of us are in a more hypo state (depression for example) which mean we are under mobilized. Take a sip of air in 1/3 of the way and make a sharp exhale through the nose snapping the belly back. Continue this way for a count of 10 focusing on the exhales instead of the inhales. Keep your face relaxed. This has an energizing effect on the body. 

Sitali Breath- This is cooling breath. It is used to calm the over mobilized nervous system. If the nervous system is in a more hyper state (anxiety for example), this pranayama demobilizes the nervous system. Make a tube with your tongue and stick it out. Breathe in through the mouth. As air passes through the tongue it will be cooling. Do this several times. 

Discharging or Lion's Breath- As a somatic therapist, this is one of my favorite and immediate tools. Breathe in fully through the nose and breathe out fully through the mouth. This provides a small "discharge" to a stimulated nervous system. As you can imagine, this is like a small earthquake discharging instead of a huge one erupting. You can take this a step further by opening your eyes wide and sticking your tongue out and making a sound for Lion's Breath. Do several rounds of either or both. 

Try these pranayama techniques during your asana practice to communicate with the soft tissue of your body. You may also take an inventory of your body off of the mat and use these techniques when you notice stress emotionally or in the body...or when you get a piece of hardware taken out of your foot :)

I look forward to seeing you all on the mat,

Sweet Day,

ARIEL

Hello Sangha

Dear Sweet Community:  

I have been working on a new website and blog. Hopefully this will be our last alignment newsletter in this format. You will be able to go to my website where all of the Alignment Friday newsletters will be archived as well as be able to subscribe to the newsletter or tell a friend to subscribe. 

Part of what has inspired me to revamp my website and newsletter is this notion of Sangha; community. I have been thinking about our classes as a time for our family to gather. Family is selected as much by the soul as it is by biology. And I want us to be able to know each other and communicate with one another. The new format will allow you all to comment on the newsletters and ask questions interactively. My new website is really designed to become more familiar with all of you. It is a chance to tell you more about myself, like a conversation over a cup of tea. I want you all to know that I am AVAILABLE to you as your teacher. Ask me questions, give me feedback. Let me know how I can serve this sangha. And conversely, perhaps this will inspire you to think about how you might serve your community more. Reach across the divide of your mats and learn about each other, see if you can carpool with one another, you might find great connection doing something that nurtures your spirit and body!!

Alignment Tip of The Week

The past two Fridays we focused on Eka Pada Raja Kapotasana (pigeon) and Camatkarasana (wild thing). 

psoas.jpg

Pigeon is a hip opener. To understand how to do it, first you must understand the basic anatomy of the hip. There are two important muscles that stabilize your pelvis; the psoas and the piriformis.  The psoas connects to the lumbar spine of your lower back and to the femur bone at the top of your leg. So it crosses from the front of the pelvis to the back. To stretch the psoas you need to rotate the femur bone or quadricep forwards and stretch the belly and ribcage out of it. Try a high lunge with your back foot pressing against the wall as you rotate your quadricep forwards and send your arms to the sky lifting your ribs out of your hips. Keep your hips at the same level. That back leg in high lunge is your back leg in pigeon. 

piriformis.jpg

The piriformis attaches to the sacrum, the last of the spine before your tail bone , and it comes across to the top of the femur bone called the greater trochanter. It is placed amongst the muscles of your booty. To stretch the piriformis you have to turn the leg out and bend the knee. 

reclined-figure-four.jpg

Try lying on your back and bring a leg into figure four. Feel your hips level on the earth with your knee moving away from you. You will feel the piriformis stretch. Notice in both high lunge and figure four the hips are level, not one lifting higher than the other. This is very important. 


0106160053fb5c08_3-Pigeon-Pose.jpg

In pigeon bring your front knee in the same line as it's hip, not underneath your belly. This is because your joints have to be in the same line so there isn't tweaking pressure on the knee. Depending on how much your hips can remain level and on the ground, you can bring the foot in towards your belly, or the shin is parallel to the top of the mat. If your back hip doesn't touch the ground slide a folded blanket or bolster underneath it. Your back leg is like high lunge, try tucking the toes under rotating the quad forward and down.  with your hips level send your arms to the sky, lifting your ribs out of your hips and then lie down. Fee; the front quad roll outwards and away from your chest. Most importantly, do not lean into one hip or the other. This keeps the stretch in the psoas in the back leg and the performs in the front.

Wild thing is a combination of side plank and a backbend. Start standing with your arms out wide in a T. bend your elbows into cactus arms and rotate your elbows forwards. Notice when you rotate the elbows forwards the shoulder blades come down the back and are both stabilized and encourage the heart open. Try coming to side plank on the  right side. Bend your right elbow slightly and rotate that elbow in towards its ribcage to stabilize the shoulder and then rotate it forwards to create an upper backbend in the heart.  With the shoulder stabilized lift the left leg and bend the knee and step it behind you over to the right. KEEP ROTATING IN THE SHOULDER. To come out of wild thing, straighten out your shoulder into side plank and then squeeze both elbows into the ribcage in middle plank. Remember that all backbends originate from your shoulders.

I look forward to seeing you all on the mat,

Sweet Day,

ARIEL

Be My Valentine...

Dear Sweet Community:  

It's that week...valentines. You know the week where you might hide in your home away from the incessant decorations of red hearts and pink balloons? 

Amidst all of this media prescription of what "love" is and what we should do with it; I got to thinking about love. What does it means to care for another person? While I am thinking about love,  I find myself, essentially, turning to the principles of love as described in the yoga tradition. In yoga we follow the yamas; moral guidelines to mitigate our own suffering and the suffering of others. In my own words, these are ways we can treat ourselves and others that show caring and deep respect.

The Yamas are:

Ahimsa: Non-harming. Obviously this is any thoughts or actions, that might harm physically or emotionally. But think about it this way, how you treat yourself might harm others. The love I have for my mom, reminds me to practice ahimsa towards myself. 

Satya: Truthfullness. Being truthful with ourselves and others has many incarnations. I think about being honest in love. Understanding what we can and cannot give another person is important. Sometimes love means honesty with each other and being brave enough to tolerate it. 

Asteya: Non-stealing. We steal in many ways. We can steal people's time, their energy, their needs, their aspirations, their inspiration. To love someone is to give to them, its not to steal from them.

Brahmacharya: Abstinance. Often we think of this as refraining from sexual activity. Traditionally Brahmacharya helps us retain our prana or life force. This is important, if we give all of our life force away then we aren't in our full vitality. When we use sexuality to bypass emotional intimacy we are robbing ourselves of prana. Or, conversely, when we are addicted to a certain emotional pattern to another it becomes toxic. Brahmacharya is abstaining from these depleting situations. 

Aparigraha: Non-greediness. I like this one the most. I think about it a lot when it comes to love. It arises when we want things our way. Or when we keep a scorecard. Love means knowing when to give even when it means we have to compromise. And to know when we have enough. On valentines, you may not get the archetypal thing that signifies love to you, but maybe notice what you have received. This prevents greediness and ultimately supports us in being present with the expression of love that is all around us. 

Happy almost Valentine's Day :)

Alignment Tip of The Week

The past Friday we focused on the Vayu's (Energetic winds). 

images.jpeg

The vayus are energetic winds. Our prana moves in several directions and each directional winds aids in certain biological and energetic functions.  I am going to talk about the vayus as they pertain to asana here. 

I have mentioned before that all living things pulsate. There is a universal pulsation of up and out and down and in. Think of a beating heart, or a wave in the ocean. We pulsate too. Our breath adheres to this pattern of pulsation and our bodies follow our breath into an extending and grounding pattern of motion.

Start standing with your legs together, your left hand on your belly and your right hand on your heart. Cultivate uijayi breath. 

Feel the breath start in the belly and the left hand as you inhale, the seat of Samana Vayu. Samana is the wind of coming back to the center, the belly. 

Continue your inhale up to your heart and the right hand, the seat of Prana Vayu. Prana is the wind of the third eye and heart region. Udana Vayu is the upwards moving wind.

The last sips of your inhale extend your arms out wide and feel your breath move out in all directions for Vyana Vayu. Vyana is the wind that pulsates out.

As you exhale bring your hands back to the heart and belly and feel your breath move down for Apana Vayu, the downward wind. And finally feel your breath draw in from all directions back to the belly and your left hand, Samana Vayu again.

Try breathing like this a few times. Then add your legs. When you exhale bend your knees and when you inhale straighten your legs and come onto your toes. Repeat this a few times. Then you can exhale bending the knees and inhale lifting one foot off of the ground, exhale bend the knees with both feet on the ground and inhale try the other leg. This will teach you to use the vayus to create a rebounding effect in your body. Think of a basketball bouncing off of the floor to bounce towards the sky. The ball goes up by dropping down and rebounding off of the floor. This is how we transition into one leg balancing, find arm balances, or even go into inversions. In order to go up we must first find the downward and inwards directionals and then we can rebound up and must feel the extension out to come back down. 

Try practicing this way through your vinyasa. You will find transitions easier this way. You may even find that the vayus help you walk with more cushioning for your joints.

Remember, this is a practice of plugging into the universal pulsation of life and it is a profound reminder that we are never alone!!


I look forward to seeing you all on the mat,

Sweet Day,

ARIEL

I am Walking!

Dear Sweet Community:  

Guess what?...I am walking! (ok fine with crutches but who's getting caught in the semantics ;)I have started doing physical therapy and the pain and limitation in my foot has been really humbling. So when I am faced with the pain I wonder; how should I handle it? Should I take the pain meds? Should I have a drink? I start to wonder if I am different from other people who might be experiencing this kind of pain- maybe they do this more right or better? And then I start realizing that well, there is no right way to move through this. I am not doing it right if I am "saintly optimistic" or "perfectly yogic". I am doing it my way. And I am accountable for my choices. 


This is true on the mat. As much as this might contradict me as a teacher to say; there is no right way to do asana. There are principles and guidelines to keep us from injuring ourselves and to encourage a certain stretch. These principles are also spiritual ones that help us from injuring ourselves or others emotionally. But really each pose and choice we have is directed by ourselves. If keeping your leg straight in a pose doesn't feel good, check in with yourself, maybe you need to do it with a bent leg. Just as me being in pain opens choices and day to day, hour to hour, the choices are shifting, so does asana open you up. Our relationship to experiences is never the same because no two experiences are duplicates. I realize there is no right way to deal with pain,  and there is no right way to move through your practice. There is your way. The next time you find yourself on the mat, try listening deeply to your body and the choices it needs you to make. Do the practice that honors you the most. You might surprise yourself...I have. 

Alignment Tip of The Week

The past two Fridays we focused on Trokonasana (Triangle pose), ParivrttaTrikonasana (Twisted Triangle pose) and The Abdominals. 

Trikonasana is an amazing pose. It stretches the deep side seam and is very good for aligning the spine. It is important to keep this in mind when you do the pose so you find the position that stretches those places for you while avoiding a compressing backbend and over stretching the top of the hamstring. To do Trikonasana stand against a wall with your feet 3 feet apart. Place a block between your right foot and the wall and then turn your right foot out so it runs parallel to the wall. Bring your left heel perpendicular to the wall and straighten both legs keeping a micro, not even visible, bend in the right knee. Standing upright open your arms so that your entire spine presses into the wall. Hinge at the waist keeping your arms, spine and hips pressing into the wall. place your right hand on the block and place your left hand on your left ribcage and roll it to the sky. Then extend the left arm up. You should feel a deep side stretch  on the left side. Keeping the right knee soft keeps you from hyperextending in the knee and overstretching the hamstring at it's attachment. 


Unknown.jpeg

Parivrtta Trikonasana is much like pyramid pose. Your legs are 2-3 feet apart on separate train tracks, with the right foot forward. The back foot is open forty-five degrees. Press down evenly through both heels and wake up your legs. Standing upright, hands on your hips fold forwards halfway with a flat back. Here you want to use the principles of a twist; the hips are stable while the spine is long, so the twist happens from the ribs. Put your left hand on the earth or a block to the inside or outside of the right foot. Hook your right thumb into your right hip crease and pull it back. With a long spine twist from the ribs sending the right hand to the sky. You will feel a stretch in the outside of the right leg and a deep twist.   


Lets talk abdominals for a moment! Your abdominals are in three layers,they cross each other so they are very strong and... WE ALL HAVE THEM. It is not that we are waiting to get them. You have a core and it is a very strong and resilient place in you. But strength is not armoring. It can be soft and receptive. When you use the abdominals they should be relaxed before you active them.  Lie on your back with your knees bent and feet flat on the floor. Bring your hands on your quadriceps down by your hip bones. Take a deep breath in and really let your belly relax and fill with air. This is called a buddha belly. Empty your belly by breathing out through the mouth while pressing your quadriceps away. Keep your belly relaxed so it falls to the low back organically. At the end of the exhale, without inhaling, sip the belly in even more. This is uddiyana bhanda. Take it a step further and interlace your fingers behind your head. Place a rolled blanket between your legs down by your pelvis. With the knees bent in line with your hips and your shins parallel to the ground, continue the same breath. Breathe in relaxing your belly, breathe out curling your chest and shoulders off of the ground, at the bottom of the exhale curl your tailbone off of the ground. Don't lift the tailbone by bringing your legs towards your chest- this is actually using the low back, instead keep the knees right over the hips and really squeeze the blanket so the lower abdomen has to ignite and work. Do a series of these and then try adding a twist on the exhales to strengthen the obliques. Remember, keep the belly relaxed.


After you do your abdominals stretch them. Backbends stretch the abdominals so a bridge pose or camel or even more gentle backbends such as cobra or sphinx pose. 

Our core is deeply supportive but not when it is armoring us and not letting the backbend or heart opener in. So remember to keep softening the abdominals and balance strengthening with opening the heart and stretching the belly.


Asana reminds us to build the relationship with our bodies and the subtle energy within us.


I look forward to seeing you all on the mat,

Sweet Day,

ARIEL

Accidents Happen to Good People...


Dear Sweet Community:  

Well, as some of you may know I am on crutches. On the sunday after Thanksgiving I was bouldering in Bishop, CA...when I fell. The falling part was expected, but my right heel missed the crashpad wish absorbs the fall and prevents injury. I fell somewhere around 11-13ft and broke my heel bone in several places. I had surgery on it and have been non-weight bearing since it happened. I have several screws and pins in my foot. I thought the struggle was the injury, but that was just the beginning... really. 

The past month I have lost the ability to independently care for myself, to walk, to eat what I want, wear what I want and use my body. Breaking my heel bone has reflected back to me how much my independence has defined who I am. Independence, compassion and strength are all things I am familiar with and comfortable in. So the past month I have been vulnerable...very vulnerable. In my vulnerability, I am discovering the deeper virtues of relationship. Relationship requires vulnerability. We are all in relationship. The fact that we don't have any control, makes us vulnerable and exposed to one another. So I have been learning the true meaning of the word tolerance. The tolerance to feel vulnerable; being in pain in front of others, just being in pain by myself, needing the help of others, accepting the deep generosity of others (yes the capacity to tolerate what a huge experience all of your generosity is!!). Yoga, the meditation and deep spiritual practice, has guided me to open up to this opportunity. It has been one of the most rich times in my life. It's as if I have been given an invitation to participate in the true experience of living in relationship to the world. All I had to do was see it that way. Through meditation, I can see it that way. 

So, I am accepting the invitations. I am devoted to this practice because it is also the deep practice of living as a human being; a fragile, imperfect, uncomfortable, emotionally messy, human being. I have learned over and over again this past month that as a human being I have very little control over anything. The only control I ever really have is my reactions; the emotional states I choose to attach to.  And I know this practice keeps me open. Whatever obstacle is in your life, whatever obstacle is in your life, whatever you see as obstacle, look towards Ganesh- the placer and remover of obstacles. For this seemingly obstacle may be an invitation participate more fully, to grow a little more, and to be more...human. 


Alignment Tip of The Week

The past Friday we focused on locomotion in the body and the booty. 

 Hey do you ever pay your booty any mind? I mean really? You can't easily see it...do you remember it is there? Your booty is a very important part of locomotion in the body. The deep back-line propels us forward. It's like swinging a bat; we can't get a strong hit if we don't follow through on the entire swing. We can't take a step forward if the booty and the top of the hamstring are out to lunch. 


To strengthen and turn on your booty, place weight in the heels. This awakens the deep back-line. Try lying on your back setting up for bridge pose but straighten your left leg on the earth. Press down through the right heel lifting your toes off of the ground. With the left leg straight do one leg bridges only allowing the left leg to lift to parallel height with the right knee. Remember to press down through the right heel so locomotion is happening from the right booty. Do ten of these and then switch sides. This will strengthen the booty. 


Afterwards take figure four to stretch out the gluteneus and piriformis muscles. 


In high lunge with the right foot forward, press down through the right heel and lift your right toes off of the ground. Roll both quadriceps inwards and lift through the pelvic floor. Bring your chest down only halfway to your quadricep with the spine straight. rock forward on the left toes so you can feel the back line turning on, stay here 5-10 breaths and then try rocking forward into Warrior III from this high lunge position. Notice that when the booty and top of the hamstring is working you can float forward with out stressing the outer hip. Try that same exercise but come all the way up to standing from warrior III with the left knee squeezing into your chest and find your way back to high lunge. Repeat the whole thing to the other side. 


These are all exercises to move from the deep back-line. When we move from the backside, locomotion becomes controlled, grounded and effortless. Don't forget to propel from the backside instead of carrying from the front side. Your booty will thank you ;)


I look forward to seeing you all on the mat,

Sweet Day,

ARIEL


The Suspension Bridge Within

Dear Sweet Community,

Do you know that the bones in your body are not fused together? I used to think that my posture and body was "preset" from the time of birth. So I always just blamed my bones for my posture; "That is just the way my body is". 

But the truth is that our bones are floating in this amazing web of fascia or soft tissue. It's more like our bones are hanging in this suspension bridge with padding in between them. So though the bones themselves are not particularly malleable, their position is. Therefore how we stand, it has more to do with the soft tissue than the bones themselves. Soft tissue is highly responsive to the nervous system. It will soften and be elastic when we are relaxed and it tightens and becomes rigid when we are stressed. Asana and pranayama calm the nervous system and stretch the soft tissue. But I find this compelling when I think about the way I stand; the choices I make with my bones. As an exercise, try just standing in your posture and notice what thoughts or stories come up about yourself. Remember, your bones are not predetermined, you may bring more or less curve to the spine, unlock your knees, spread your toes, loosen the pelvis etc. 

Alignment Tip of The Week

The past two fridays we focused on The spine and the baby backbends; salamba bhujangasana (sphinx pose), bhujangasana (cobra pose) and urdhva mukha svanasana (upward facing dog).

It is really useful in your asana practice to know how the spine works and the function of each part. 

The Cervical spine or the Neck- These vertebra like flexion and extension and have some rotation. They like lifting the chin 3/4 of the way to the sky and pulling the chin down to the chest. Thoracic spine or upper back- Enjoys arching and curling. Lumbar spine or middle to lower back- The middle of the back enjoys twisting. We twist from the middle of the back NOT from the shoulders. The lower back balances the upper back ad again, like to arch and curl. Sacral spine or tail- The sacrum is like an arrow- it directs the low back. When it points up the back arches and when it points down the back curls. 

As I said twisting needs to happen from the middle back. Conversely, back bending happens from the upper back and lower back. Because the low back has the capacity to hinge a lot, it is important not to take the burden of the backbend into the low back-that bend needs to be balanced between the upper and lower back. The baby backbends are great ways to work the upper backbend. The three poses all have straight legs with the tops of the feet pressing down into the earth. The heels roll slightly away from one another. Try placing a block between the legs so that you are using the inner line of the legs and press back through the heels so the arrow of the sacrum points slightly down. Think of these three poses as a progression in the upper back and shoulders:

In Sphinx pose the forearms are on the earth parallel, elbows slightly in front of the shoulders. Press the hands flat into the earth pressing the earth away, as you do this, draw your shoulder blades down your back. Breathe into your collarbones widening them from left to right. Breathe into the back of your head, so it stacks right on top of your shoulders, chin is level to the earth. Remember, the neck is fragile and cannot take the full burden of the arch in the spine.

Cobra is the same as sphinx but the hands are placed right beside the shoulders on the floor. Cobra can be just a few inches off of the floor or arms almost straight. Your elbows squeeze into the ribcage so the shoulder blades come down the back just like sphinx. If the shoulders come up by your ears, you need to bend the elbows more. It should feel like the heart is reaching through the shoulders and up to the sky. 

Upwards facing dog is just like cobra except the legs are off of the ground. Again, the legs are straight and you are resting on the tops of the feet. Try keeping the elbows slightly bent in up dog and keep working the heart to the ceiling with the elbows squeezing in and shoulder blades down the back. 

These three backbends are in the vinyasa because they really warm up the upper back and help us protect the low back. Please take the time to do them correctly so you really care for your spine in this practice. Heart opening should feel expansive and liberating, not contractive. Happy upper back bending :)

I look forward to seeing you all on the mat,

Sweet day,

ARIEL